
Coin-op
Prints the wrong letters sometimes. Internal mechanisms probably need alignment or have suffered from wear.
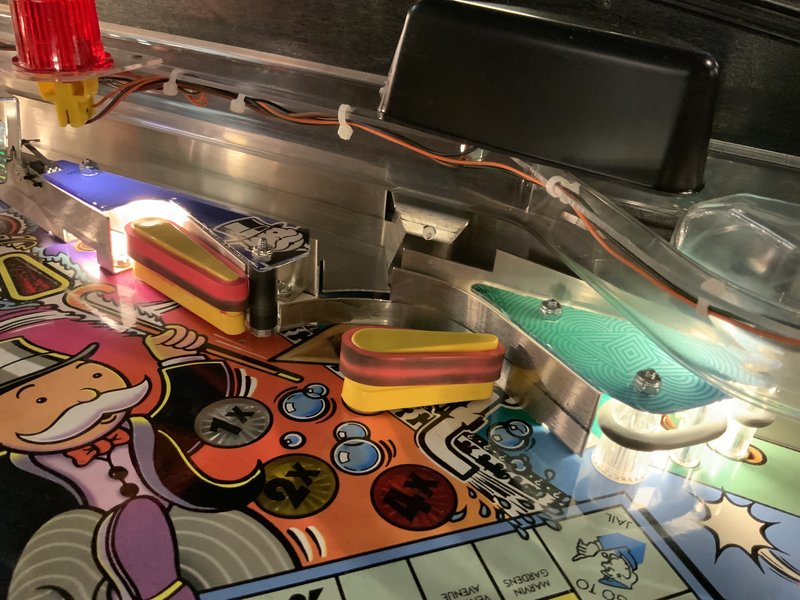
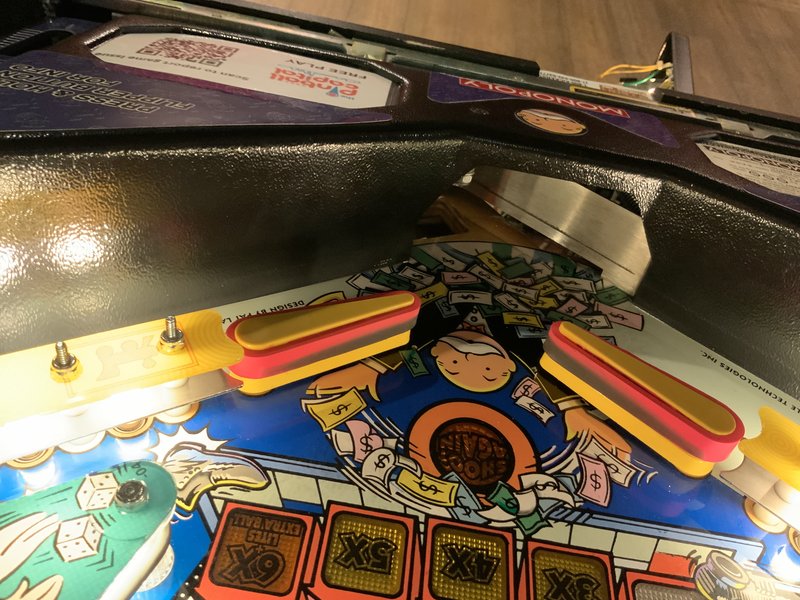
Found piece of broken plastic in the coin box while milking cows. Located broken plastic on playfield, it’s the left slingshot cover under the Squirtle bowl diverter.
We might have a spare plastic in the bag (in the machine) for a replacement. We should take a look at the placement of the diverter/drop from the ramp so that this doesn’t happen again. We should let the distributor/Stern know as well.
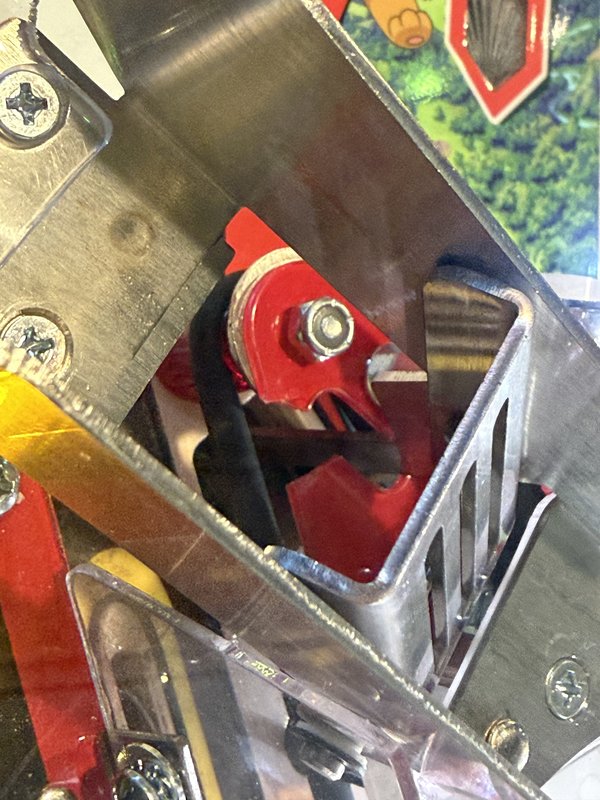
Plunging does not always make it all the way around. Rattles on the way up
Some of the connectors were replaced at some point and weren’t done correctly. One is split in half and missing the key pin. One is upside down and loose. A few are missing their keys. Check all the molex’s just to ensure they’re where they should be and keyed.
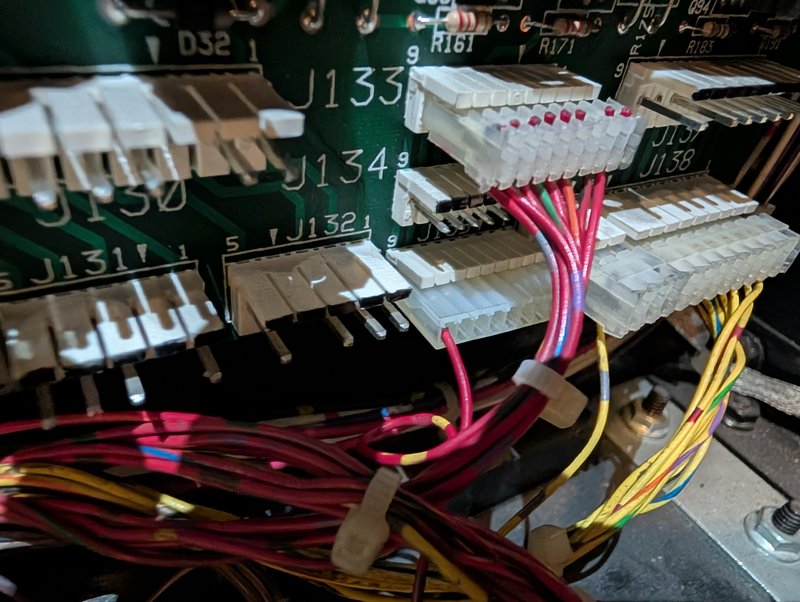
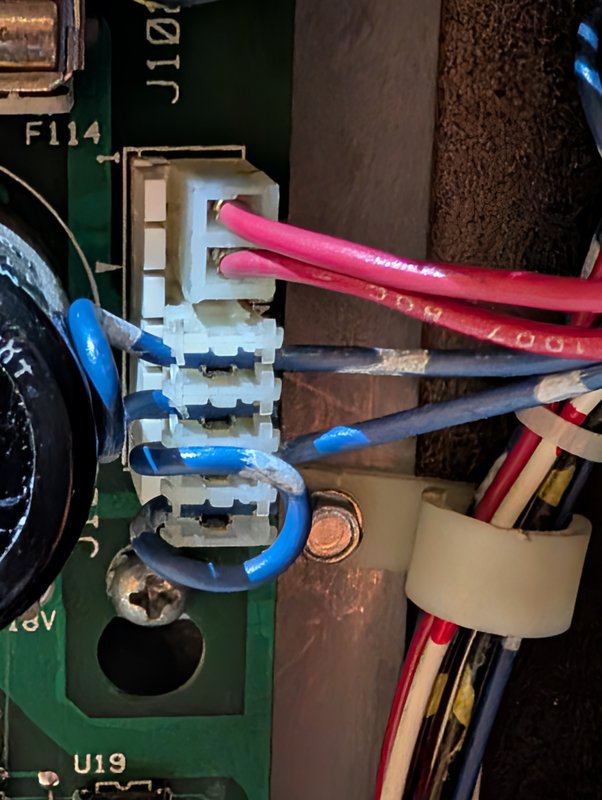
5v rail measures at 4.8v even after replacing open rectifier. Stable voltage, but may cause issues down the line. Most likely due to filter cap.
Addams Family is looking grubby. Make it shine!
Regular cleaning
To keep play fun and to minimize wear and tear, we regularly clean and wax pinball machines. Here’s how:
- remove the glass
- remove all balls
- using only wax and a microfiber cloth, clean and wax the entire playfield
- using Novus 1, clean the plastics
- check every elastic; replace if cracked or stretching, otherwise clean
- clean all the verticals, including targets
- replace any dead bulbs
- tighten any loose screws
- check flipper strength
- replace the balls with new ones
- play a test game
- wearing gloves, clean both sides of the playfield glass
- close it up
Still having issues registering quarters. Customer put 2 in and it only registered 1. Sorry to be the bearer of bad news! Unsure if this should be marked as minor or major.
Monitor coin slot regularly, as there were at least 4 quarters jammed into the slot today. I was able to take a pointed wooden rod and pull down the coin release from inside the machine to have them run through all the way. I ran $4 worth of credits into the machine successfully. The next audit will be slightly off for this reason. I’ve placed a small sign by the coin slot asking folks to slowly add one coin at a time.
Guest reported that volume was gradually going down while playing. May be worth playing a few games to see if this is a consistent issue. I haven’t heard of this happening yet.
To-do:
Install Free Play & High Score Save Kit
Part is located in coin door
Museum
Litany of issues:
- Ball can get stuck in the right lane as pictured, resetting the game will eject the ball
- Several rollovers and pop bumpers not scoring as they should.
- Cannot add more than one player
- Game sometimes starts with flippers/playfield inactive
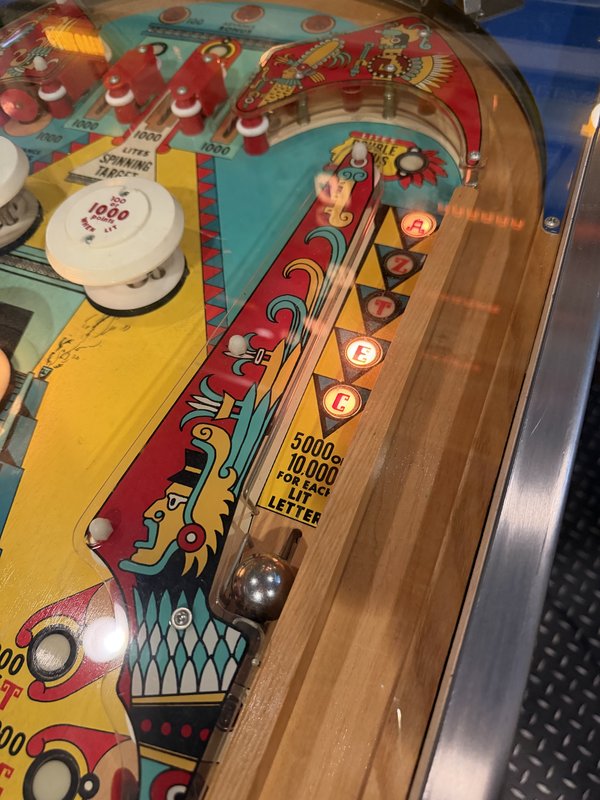
TILT light is constantly on, though the machine never appears to be in tilt state
Game keeps adding players after 4 players.
Machine doesnt end game after 5 balls. It keeps count of the balls played correctly but would seemingly let you play infinite balls in a game
Left flipper continues to get stuck.
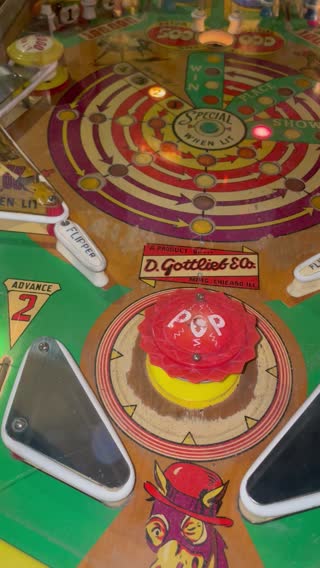
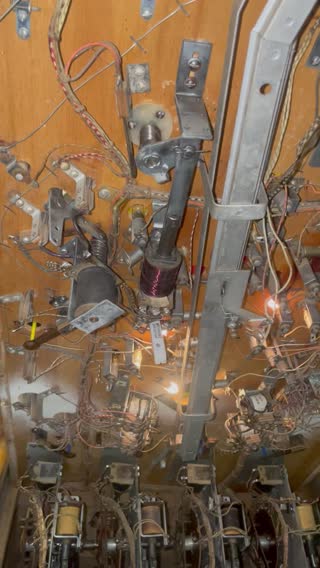
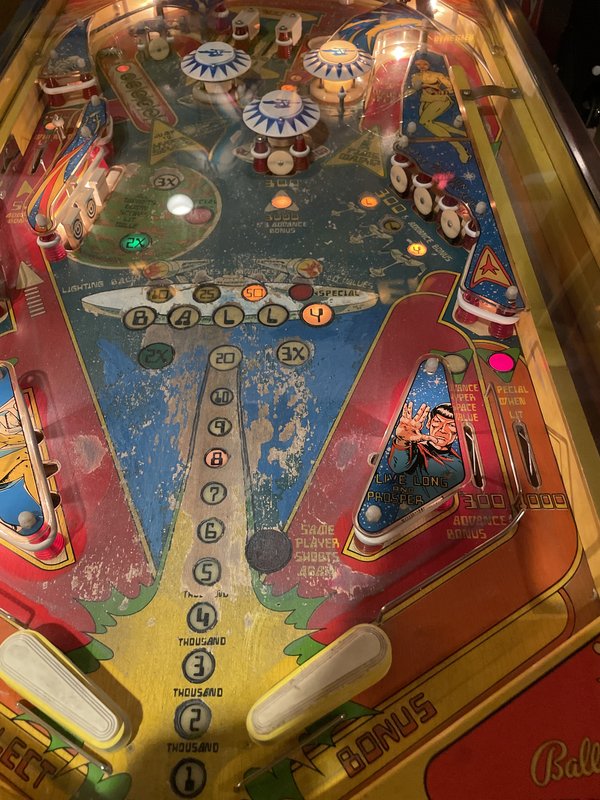
Several lights are out. Bumper 4, Advance 1 ,Advance 3-4 , both left 100,000 , left 50000
Lock bar not sitting flush on the machine. Potentially normal for the machine, consider sanding down the lock bar so it sits flush.
Large score wheel sometimes doesn’t fully reset.
2000 bonus score lamp is dead
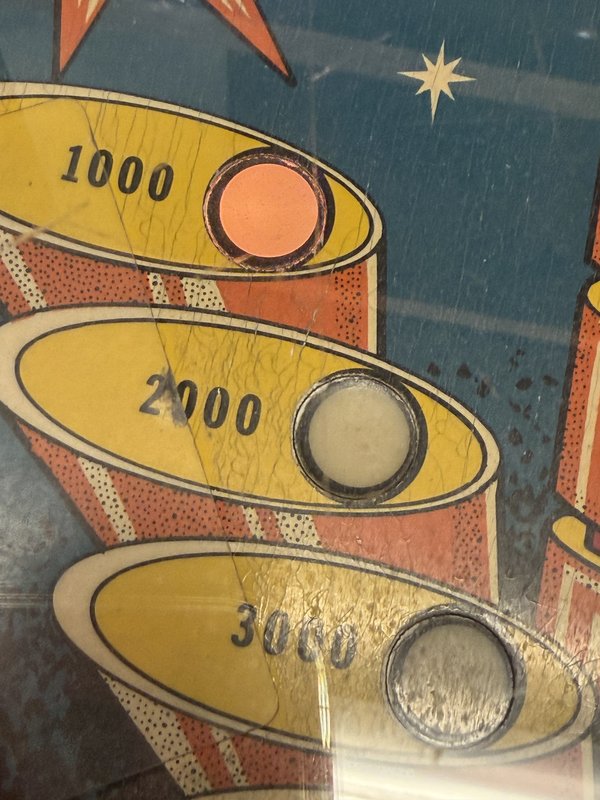
Several lights are out in the playfield:
- Alien Abduction
- Martian Happy Hour
- Martian’s Right Eye
- Skill shot right rollover
Ball is struggling to launch all the way (weak) on the first try. Usually fine on the 2nd attempt. Machine still playable.
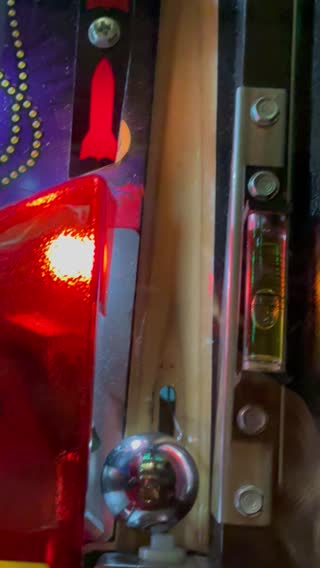
One of the PC fans sounds sick on startup. Let’s replace it before it fails.
Some lamps do not work after being replaced with new 555 bulbs (multiball arrow, 5 million targets)
Look into a possible divot or residual magnetism under where the ball drops for the gumball (ball rides the rail, stops, drops, and then is supposed to roll down the playfield, but it’s not rolling down the playfield).
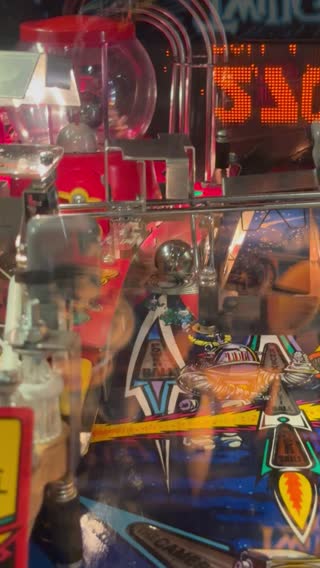
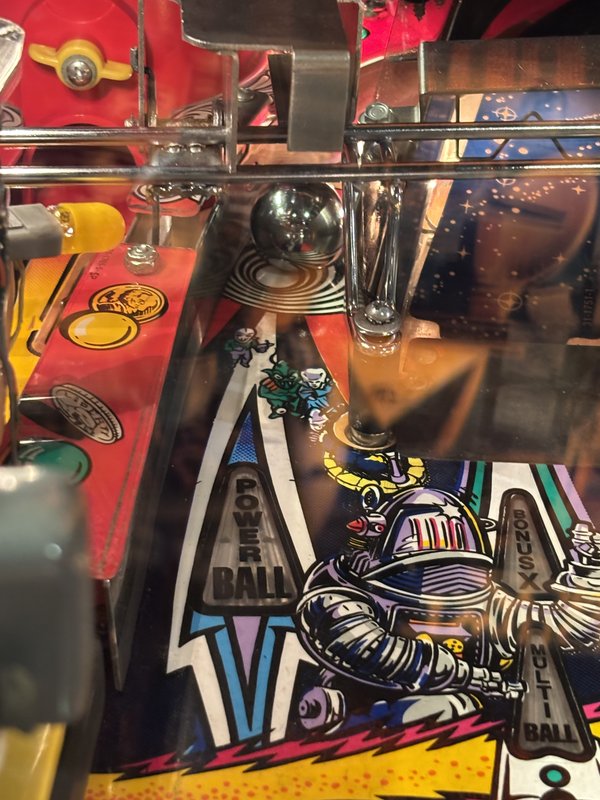
All of the screensavers have disappeared
When the Mystery Wheel stops spinning the game awards something different than what the clown is pointing to.
Still needs some LED lamps and flashers replaced. They’re on order.
11 bumper needs adjustment
Many back glass lights out including 7 and right ship
The bell is not sounding and numeric scores are not advancing or lighting up. Bumper score lights work.
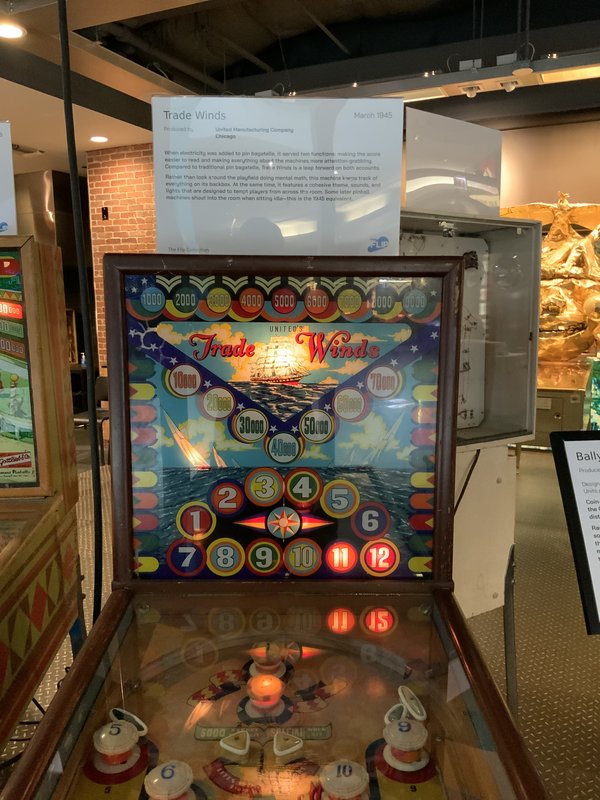
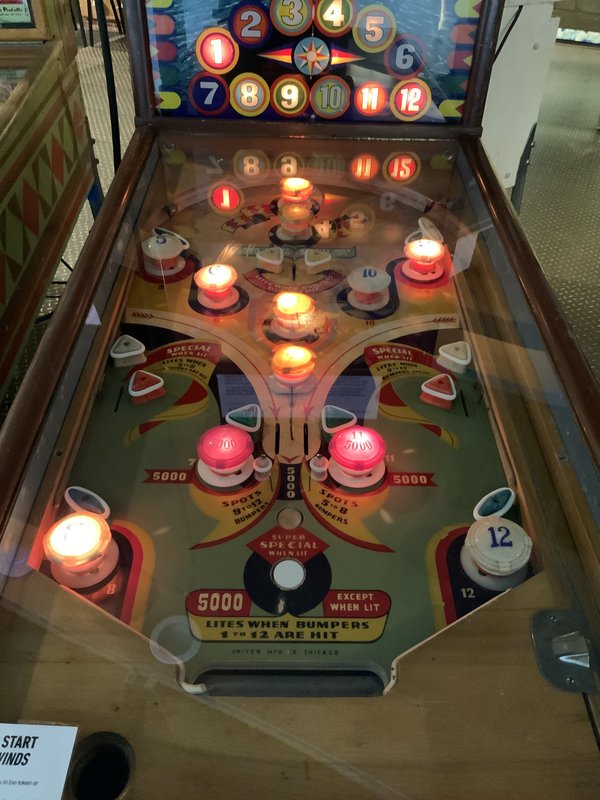
Problems with playfield lighting. 5 and 12 bumpers do not light on game reset. 10 bumper dim. 7 bumper loose and 10 is out
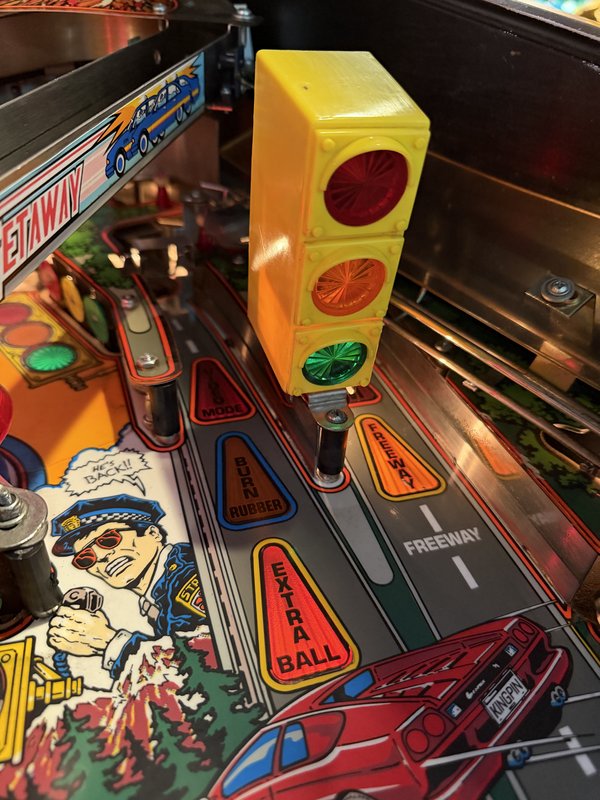
Burn Rubber lamp and Red stoplight lamp are out. Tried replacing bulbs but that did not fix the issue
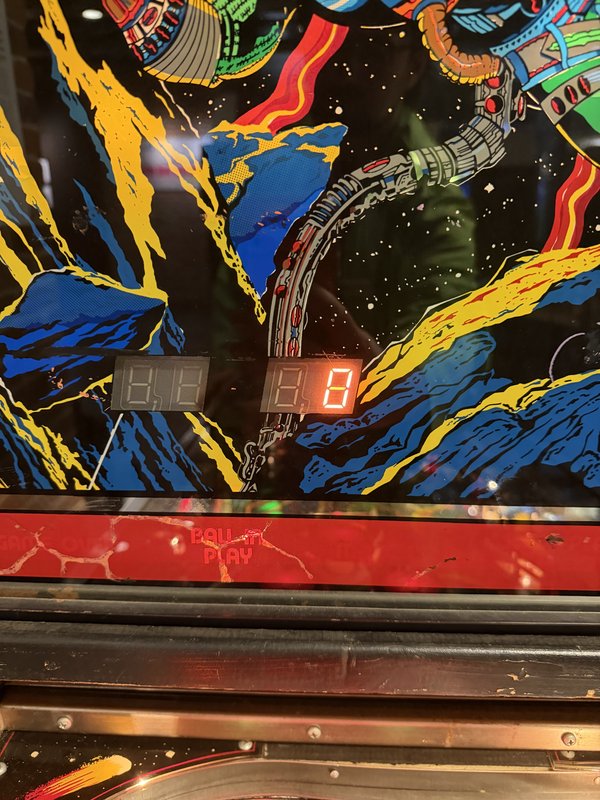
The ball in play/match portion of display is overly bright and not properly displaying the right digit
The left flipper does remain slightly stronger than the right. I spent a lot of time focued on the solenoid alignment and the eos switch, i forgot to look at the flipper button leaf switch, should be checked for charring/corrosion, but not pressing
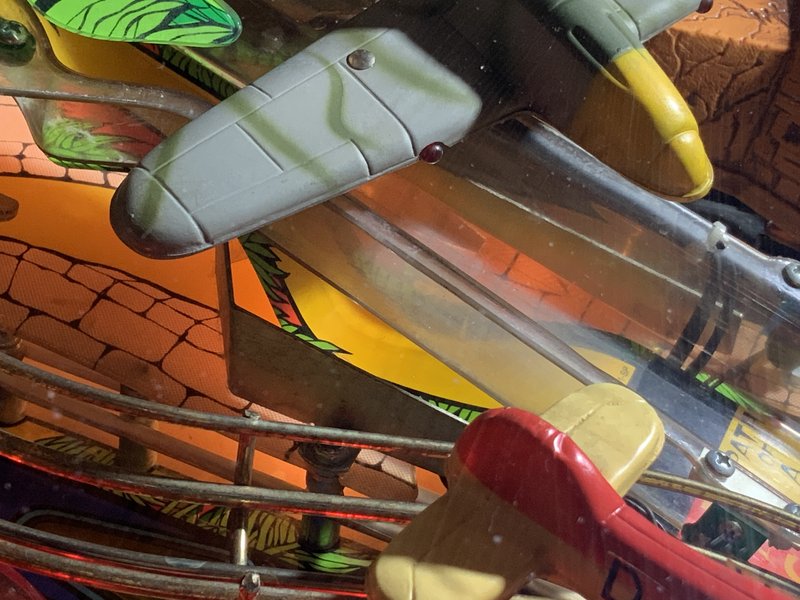
3 flashers not working
Right Side
Totem Multiball
Jackpot Multiplier
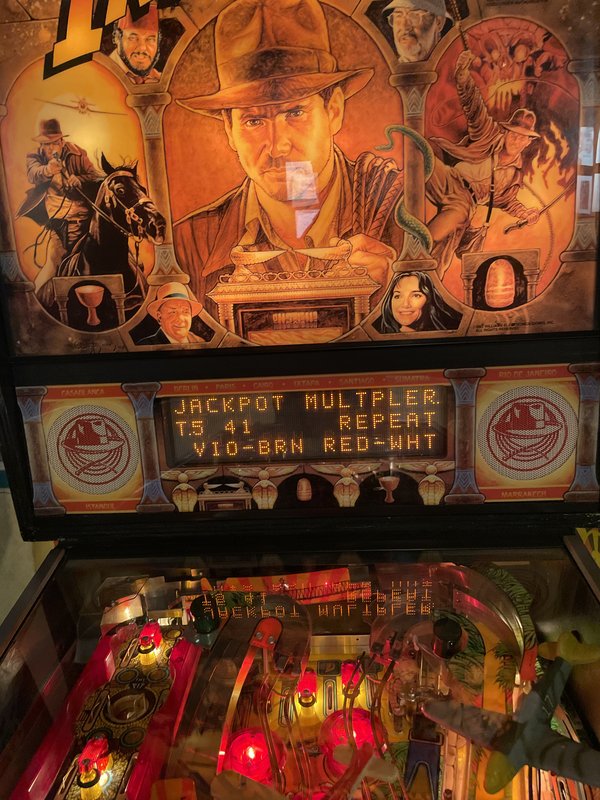
“Mode start” hole often rejects the ball when shooting at it quickly.
intake checklist
When we receive a machine, even when we’re told it’s perfect, we need to check it out and get it up to our standards. That’s usually not hard, but there are a lot of small things.
As you go through this checklist, you will find problems. If they’re obvious or if you’re going to take care of them right away, there’s no need to put them in a checklist. (But if you take care of things, make sure to mention it in the maintenance log.) For anything non-obvious that will be worked on later, put it in a to-do list.
setting it up
- match the legs with the corners; shorter in front, taller in back
- stand the main cabinet up on its back
- attach the front two legs, making sure they’re snug
- with two people, tip it forward so it’s resting on its front legs
- with two people, lift up the back and and put the pinball thing under it (the long way)
- with two people, attach the rear legs, making sure they’re snug
- remove the pinball thing
- with two people, if the backbox is separate, put it on and bolt it down, making sure that the power cord will be free to be plugged in
before powering on
- clean out any loose parts and labels in cabinet and backbox, and put them in a quart ziplock labeled LOOSE PARTS
- if there is a manual or other paperwork, put it in a 2-gallon ziplock
- vacuum out the cabinet and backbox
- check the power cord; if it is damaged, short, or ungrounded, replace it
- use a multimeter to check that all 3 prongs are connected, especially the ground
- check the wiring to the switch and main transformer
- check that all the fuses are present and the correct values
- look for damaged or burnt components
- if cables have been disconnected in the move, make sure that they are all back in their proper places
- look for loose/floating wires
- look for wires or wire bundles that rub or are at risk of getting caught when the playfield, backbox, or coin door are opened and closed
- look for loose or disconnected cables
- if necessary, untangle cables
- look for loose nuts, posts, etc
- look for circuit board damage (e.g., burning or corrosion from batteries)
- if it has batteries, replace them with fresh lithium ones
If you’re pretty confident that nothing bad will happen, you’re ready to plug it in and turn it on.
first power on
- know where the fire extinguisher is
- plug it in and make sure the magic smoke doesn’t come out
- be ready to immediately turn it off or unplug it
- turn it on; watch for sparks or crackling; smell for smoke or melting
- look at
- general illumination
- controlled illumination
- displays
- initial startup cycle
If it makes it through the startup cycle in good form, you’re ready to start a game.
first game
- replace the ball(s) with new ones
- start the game, adding credits if needed
- launch the ball and try it out
- look for
- smooth rolling
- all flippers working and strong enough to make key shots
- lights working
- switches working
- all active elements working
- ramps and wireforms are working well (not loose, not cracked, ball moves smoothly)
- correct sound (bells, chimes, audio, voice)
- correct displays (all digits on all positions work, displays work well and look good)
- switches properly gapped (e.g., slingshots fire correctly)
You will probably find some things to fix and adjust. Go for it. If you’re working on a solid state machine, remember to never use metal tools while the machine is on.
detail work
These will take a while, but they’re worth doing well. Dirt is a major cause of playfield wear, which we want to minimize. And it’s much easier to fix a problem now when the machine is in the workshop than later when it causes a problem for players on the floor.
- thoroughly clean the playfield and playfield elements
- replace any elastics that are worn or too dirty to clean
- check every bulb, possibly using a self-test
- if it’s an LED but the machine came with incandescents, replace it (when in doubt, use a #47)
- if it’s dim or flaky, try cleaning the socket and/or replacing the bulb
- replace #44s with #47s
- if it’s dim and behind plastic, try cleaning both sides of the plastic and the bulb
- look for loose screws, missing post caps, and other things out of spec; if needed, search for photos showing what it looks like
- look for cracked or broken plastic elements; stabilize or replace
- check every switch, possibly using a self test
- replace at least the coin door lock with our standard lock, text up, so that when it’s locked the key slot is horizontal
- if the backbox lock is in good shape, you can just hang the key(s) on a hook inside the coin door (which you can make out of wire or a paperclip if there isn’t one); otherwise, replace it with the standard one
- make sure the backglass doesn’t rattle even when shaking the machine; if it does you may need to add tape or padding
- make the the backglass trim, if there is any, doesn’t easily come off
- check the beer seal on the lockbar and replace as needed
- level the machine
settings
If you haven’t done it earlier, when appropriate makes sure the machine is set for:
- standard settings (for this, it may be easiest just to leave the machine off with batteries out for 30 seconds or so)
- free play
- correct number of balls per game (3 for solid state, 5 for EM)
- if it has a match mode, it should be on (doesn’t matter for free play, but people like it)
- a reasonable volume level
- correct date and time
- connected to our wifi
- Insider Connected activated for our account
final cleaning
Once everything internal is clean, safe, solid, and working well, it’s time for a final cleaning.
- clean the legs
- clean the main cabinet
- clean the backbox
- clean the lock bar
- clean the backglass
- clean the playfield glass (do both sides, and wear gloves so you don’t smudge it before putting it back)
finishing up
- any significant work has been logged here or in a new log entry
- change the machine status to Good
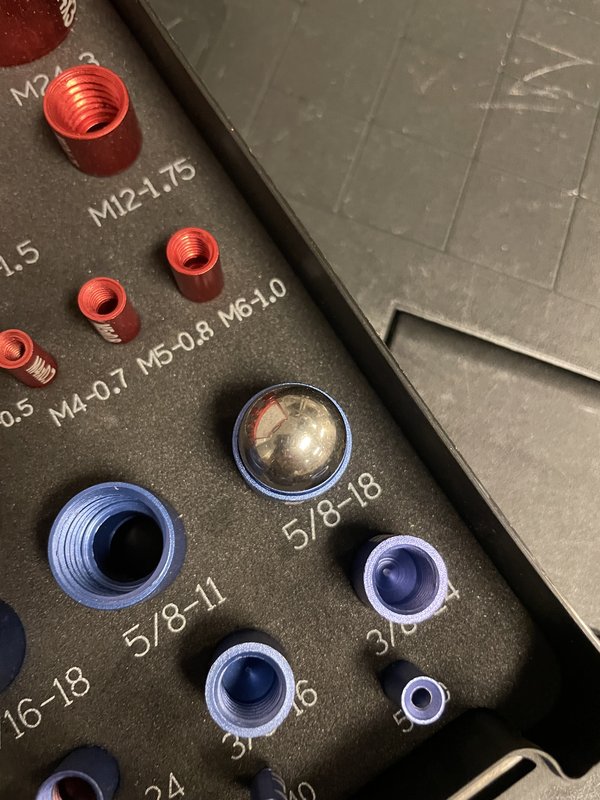
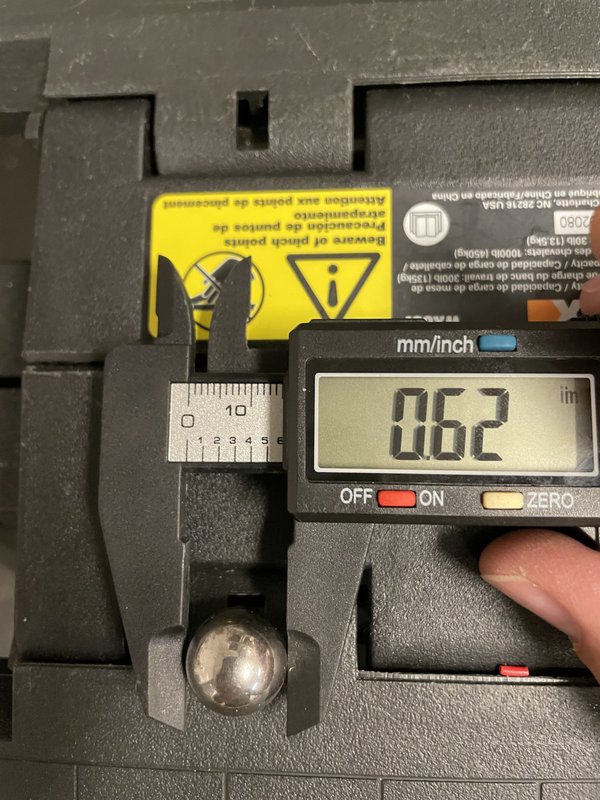
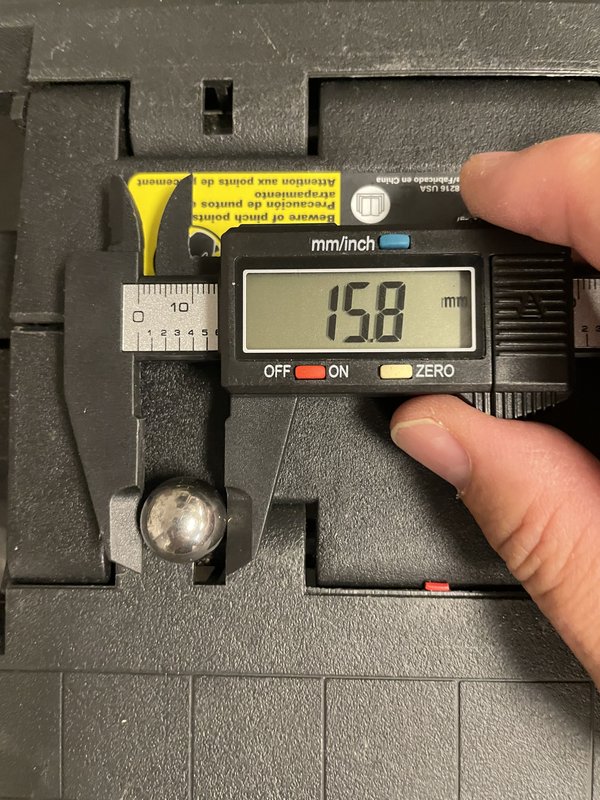
Machine is down to 7 of 10 pinballs, size 5/8"
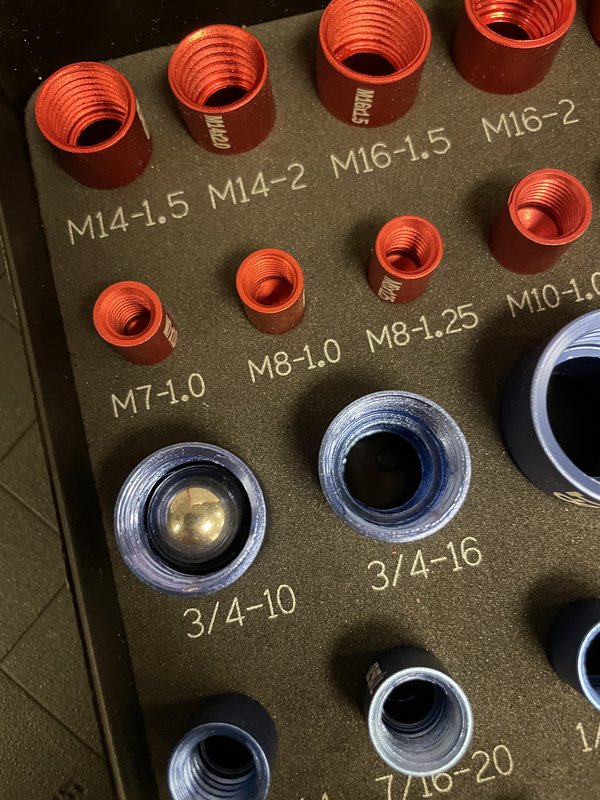
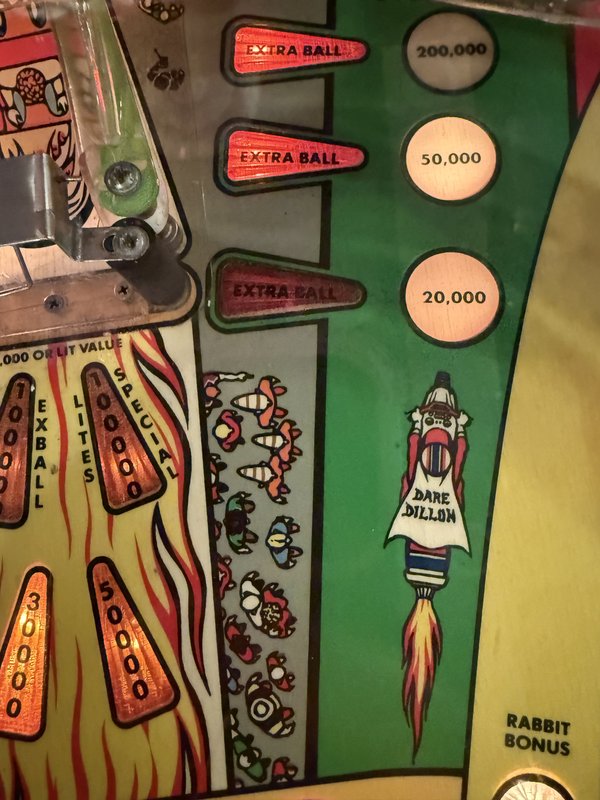
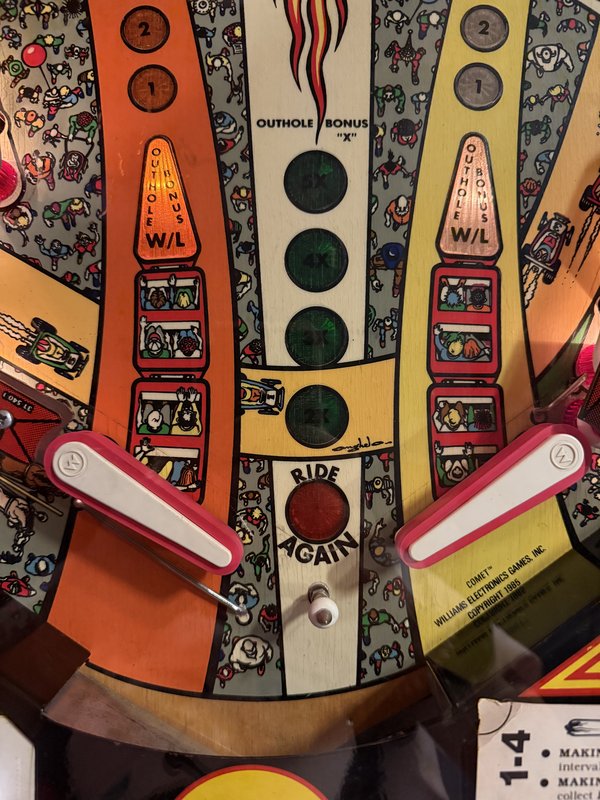
Multiple lights in the playfield are not turning out or shining very dimly.
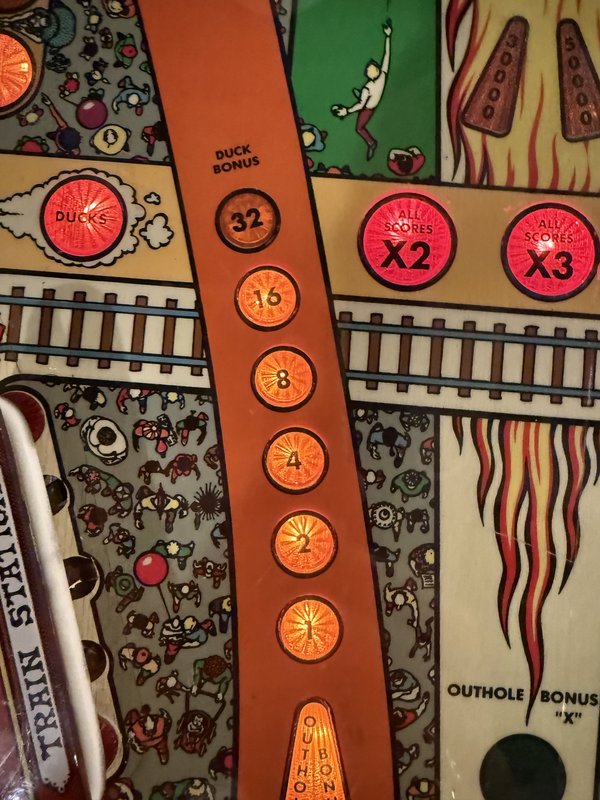
While no game is being played, periodically seems to be cycling through some components getting triggered, as if a ball is trying to launch. It appears that the plunger is automatically going off. It’s hard to tell if any other component is getting triggered as I haven’t been able to time it to watch for it to happen.
There are a few remaining caps on the main board to change out. Replace when stock comes in
Current to-do
- Replace back panel #63 bulbs
- Replace corkscrew and cyclone jump #63 bulbs
When we receive a machine, even when we’re told it’s perfect, we need to check it out and get it up to our standards. That’s usually not hard, but there are a lot of small things.
As you go through this checklist, you will find problems. If they’re obvious or if you’re going to take care of them right away, there’s no need to put them in a checklist. (But if you take care of things, make sure to mention it in the maintenance log.) For anything non-obvious that will be worked on later, put it in a to-do list.
before powering on
- clean out any loose parts and labels in cabinet and backbox, and put them in a quart ziplock labeled LOOSE PARTS
- if there is a manual or other paperwork, put it in a 2-gallon ziplock
- vacuum out the cabinet and backbox
- check the power cord; if it is damaged, short, or ungrounded, replace it
- use a multimeter to check that all 3 prongs are connected, especially the ground
- check the wiring to the switch and main transformer
- check that all the fuses are present and the correct values
- look for damaged or burnt components
- if cables have been disconnected in the move, make sure that they are all back in their proper places
- look for loose/floating wires
- look for wires or wire bundles that rub or are at risk of getting caught when the playfield, backbox, or coin door are opened and closed
- look for loose or disconnected cables
- if necessary, untangle cables
- look for loose nuts, posts, etc
- look for circuit board damage (e.g., burning or corrosion from batteries)
- if it has batteries, replace them with fresh lithium ones
If you’re pretty confident that nothing bad will happen, you’re ready to plug it in and turn it on.
first power on
- know where the fire extinguisher is
- plug it in and make sure the magic smoke doesn’t come out
- be ready to immediately turn it off or unplug it
- turn it on; watch for sparks or crackling; smell for smoke or melting
- look at
- general illumination
- controlled illumination
- displays
- initial startup cycle
If it makes it through the startup cycle in good form, you’re ready to start a game.
first game
- replace the ball(s) with new ones
- start the game, adding credits if needed
- launch the ball and try it out
- look for
- smooth rolling
- all flippers working and strong enough to make key shots
- lights working
- switches working
- all active elements working
- ramps and wireforms are working well (not loose, not cracked, ball moves smoothly)
- correct sound (bells, chimes, audio, voice)
- correct displays (all digits on all positions work, displays work well and look good)
- switches properly gapped (e.g., slingshots fire correctly)
You will probably find some things to fix and adjust. Go for it. If you’re working on a solid state machine, remember to never use metal tools while the machine is on.
detail work
These will take a while, but they’re worth doing well. Dirt is a major cause of playfield wear, which we want to minimize. And it’s much easier to fix a problem now when the machine is in the workshop than later when it causes a problem for players on the floor.
- thoroughly clean the playfield and playfield elements
- replace any elastics that are worn or too dirty to clean
- check every bulb, possibly using a self-test
- if it’s an LED but the machine came with incandescents, replace it (when in doubt, use a #47)
- if it’s dim or flaky, try cleaning the socket and/or replacing the bulb
- replace #44s with #47s
- if it’s dim and behind plastic, try cleaning both sides of the plastic and the bulb
- look for loose screws, missing post caps, and other things out of spec; if needed, search for photos showing what it looks like
- look for cracked or broken plastic elements; stabilize or replace
- check every switch, possibly using a self test
- replace at least the coin door lock with our standard lock, text up, so that when it’s locked the key slot is horizontal
- if the backbox lock is in good shape, you can just hang the key(s) on a hook inside the coin door (which you can make out of wire or a paperclip if there isn’t one); otherwise, replace it with the standard one
- make sure the backglass doesn’t rattle even when shaking the machine; if it does you may need to add tape or padding
- make the the backglass trim, if there is any, doesn’t easily come off
- check the beer seal on the lockbar and replace as needed
- level the machine
settings
If you haven’t done it earlier, when appropriate makes sure the machine is set for:
- standard settings (for this, it may be easiest just to leave the machine off with batteries out for 30 seconds or so)
- free play
- correct number of balls per game (3 for solid state, 5 for EM)
- if it has a match mode, it should be on (doesn’t matter for free play, but people like it)
- a reasonable volume level
- correct date and time
- connected to our wifi
- Insider Connected activated for our account
final cleaning
Once everything internal is clean, safe, solid, and working well, it’s time for a final cleaning.
- clean the legs
- clean the main cabinet
- clean the backbox
- clean the lock bar
- clean the backglass
- clean the playfield glass (do both sides, and wear gloves so you don’t smudge it before putting it back)
finishing up
- any significant work has been logged here or in a new log entry
- change the machine status to Good
This thing gets jammed up all the time. Someone needs to spend time running a lot of balls through it and seeing what isn’t reliable. Ask William to show you what the deal is
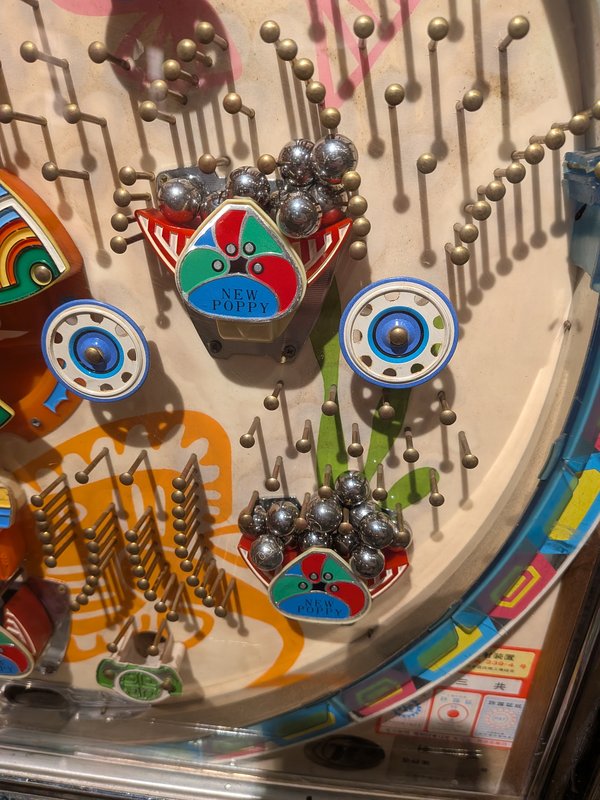
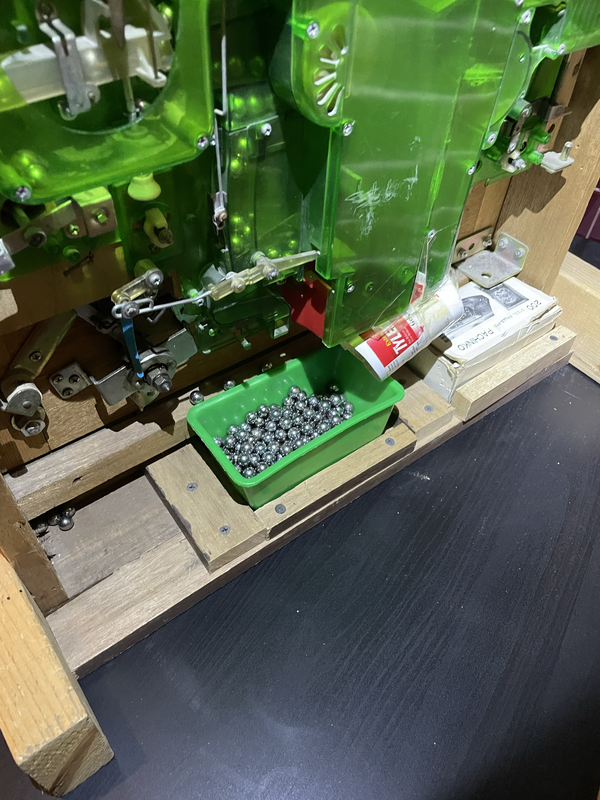
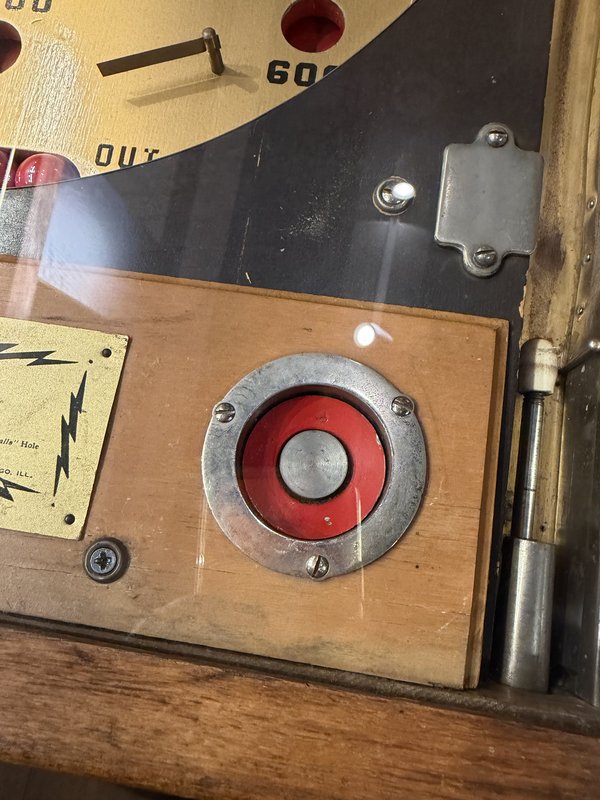
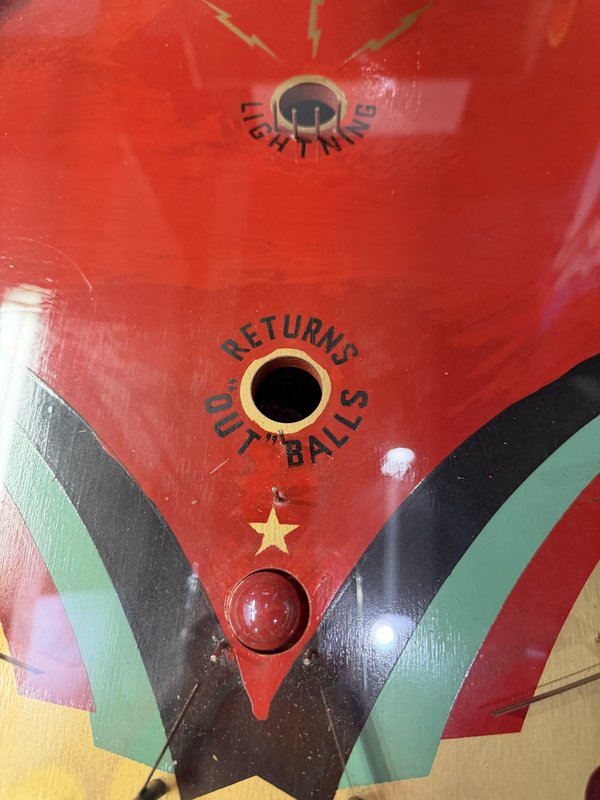
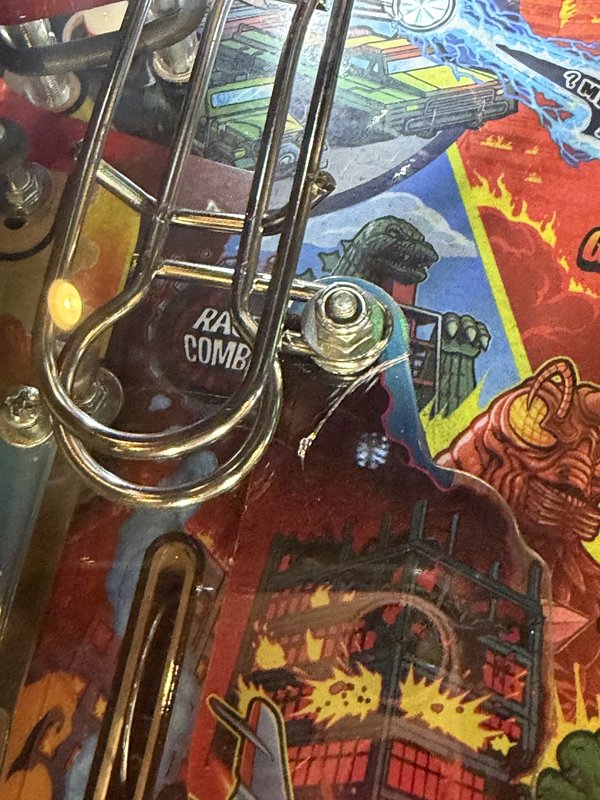
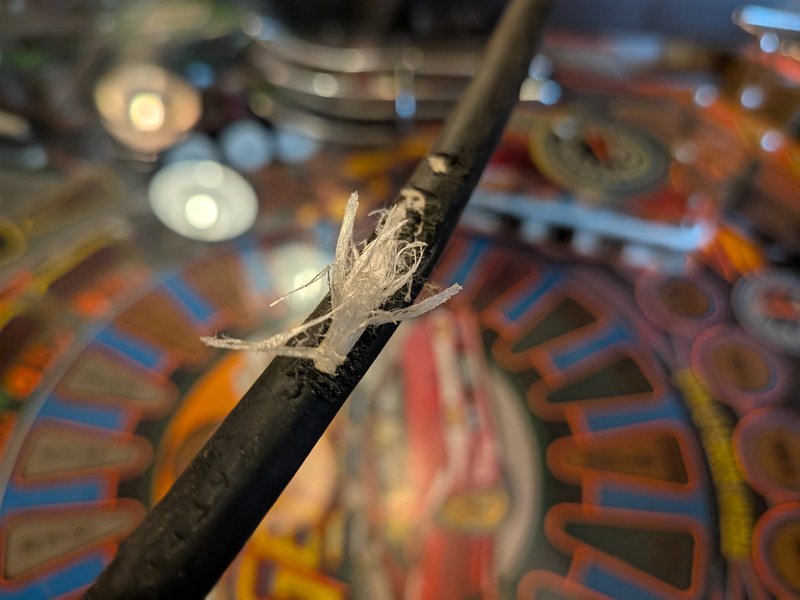
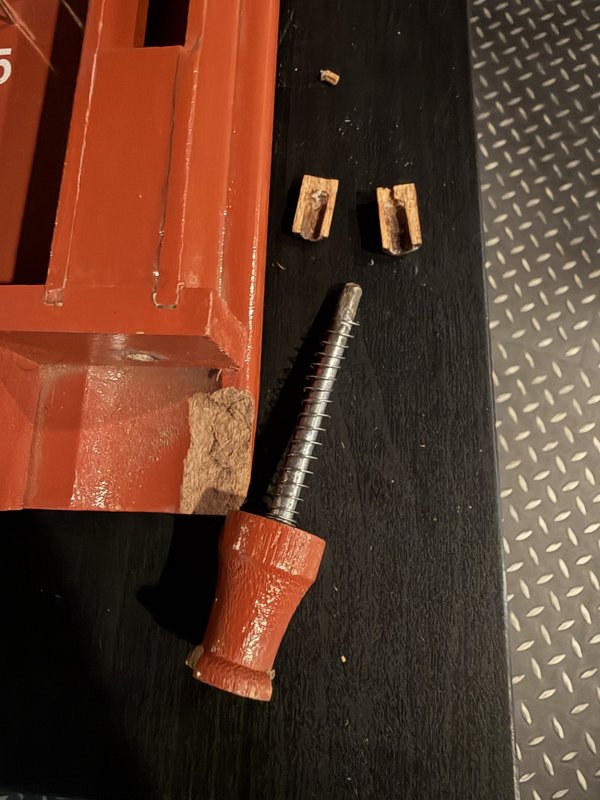
Shooter rod tip broke apart
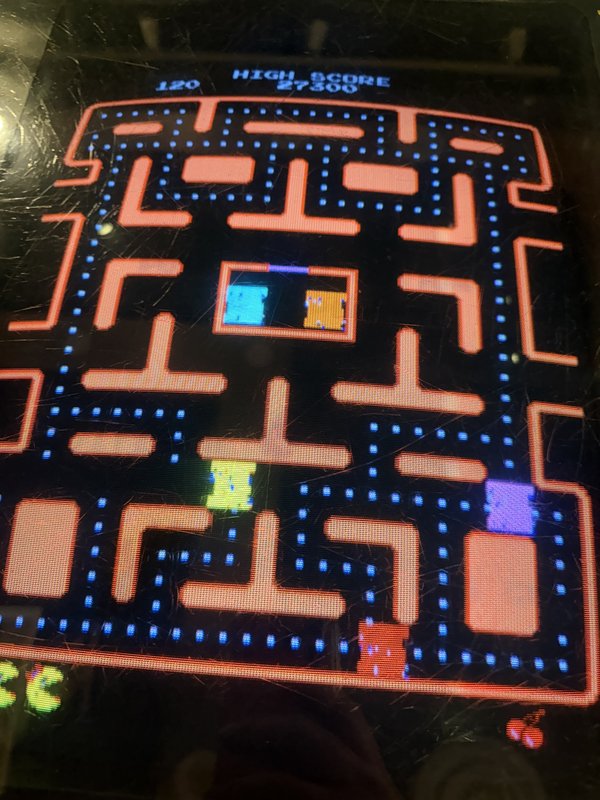
Sprites start looking corrupted after playing for a few levels. Rebooting/power cycling the game fixes it temporarily.
Happened to notice a loose wire when i was lifting the playfield up. Didn’t investigate much, not sure what the leaf switch it goes to controls
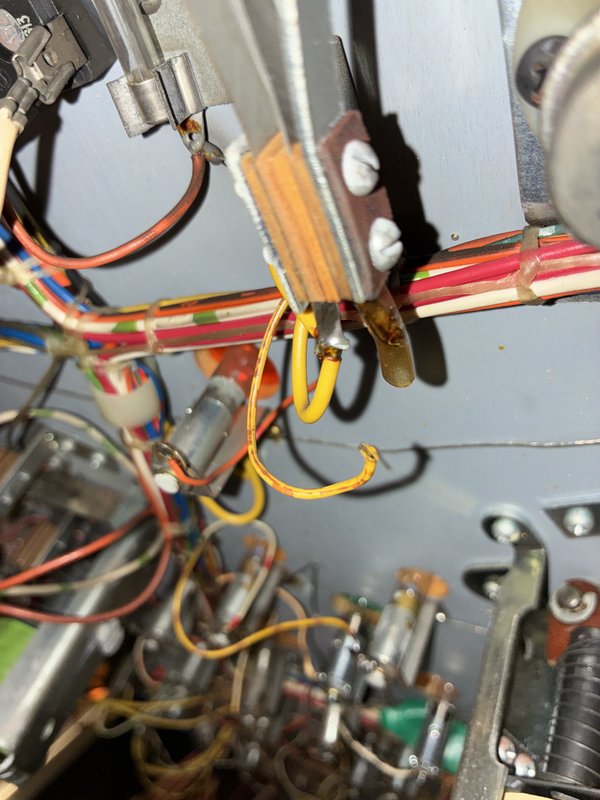
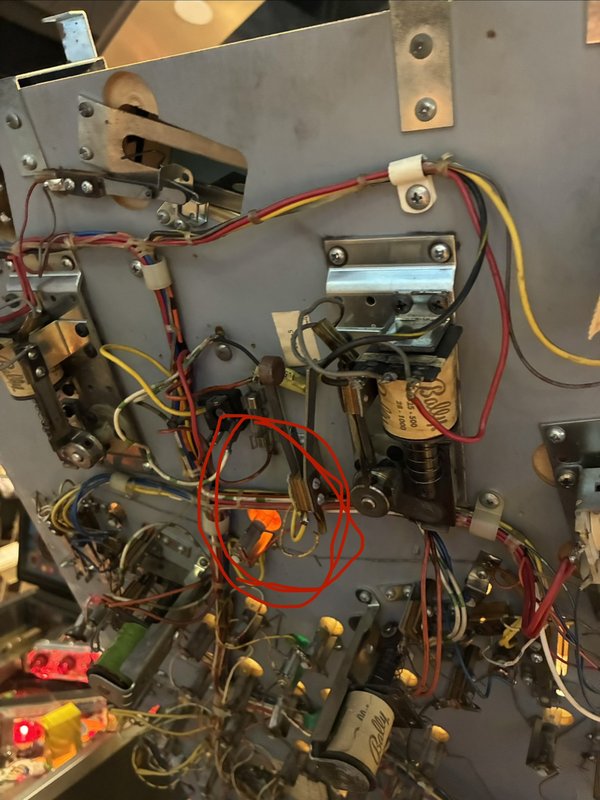
I want to try and rise the back feet up slightly and try using a plastic slug coin so people can consistently play. I will also make a sign asking people to be gentle with this game for our opening weekend
Maximum number of credits appears to be 1, but ROM and the DIP switches theoretically support max of 5, 8, 10 or 15. Not just 1. It would be good to understand why this is happening.
This is quite possibly related to the accumulator problem and possible RAM problem discussed in https://flipfix.theflip.museum/problem-reports/75/
http://www.pinrepair.com/sys1/
https://www.pinwiki.com/wiki/index.php/Gottlieb_System_1
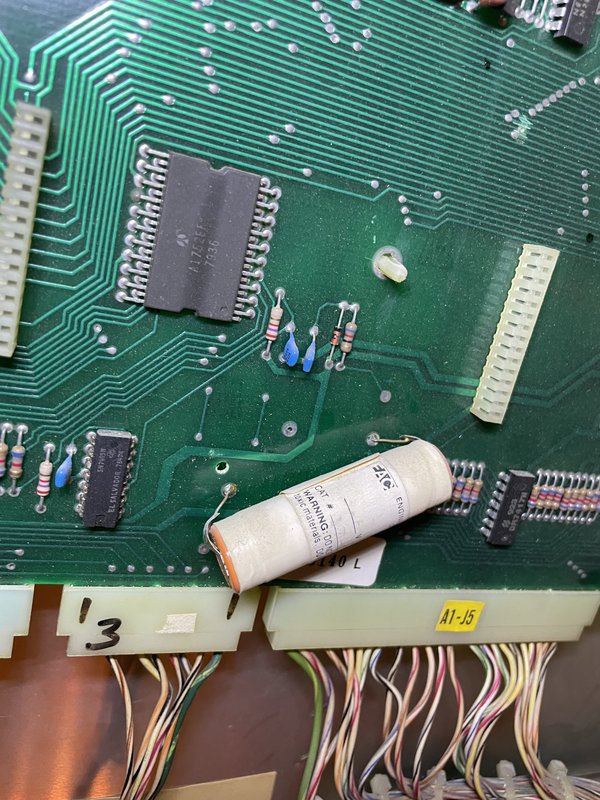
Accumulators / bookkeeping do not seem to work. Specifically, even after tilts and games, the machine reports zero tilts and zero games.
My chief suspect at the moment is bad RAM
Replace the power supply’s C1 5/12 volt Filter Cap
“…Unfortunately C1 at 2900 mfd (or 4700 mfd) is way too small of a filter cap, and the fact that this cap is 30 years old isn’t helping things either. Replace this cap with a new 6800 mfd to 10,000 mfd 16 volt or higher filter capacitor.
When replacing this capacitor it is NOT necessary to take the whole power supply apart! Just cut of the old capacitor off the power supply board, leaving the old cap leads as long as possible…”
To-do:
Install 6100 Monitor Low Voltage Section Regulator Upgrade
Part is located in coin door
One playfield illumination bulb lamp (under a bumper) is out. Replace when machine is being worked on for something more major
intake checklist
When we receive a machine, even when we’re told it’s perfect, we need to check it out and get it up to our standards. That’s usually not hard, but there are a lot of small things.
As you go through this checklist, you will find problems. If they’re obvious or if you’re going to take care of them right away, there’s no need to put them in a checklist. (But if you take care of things, make sure to mention it in the maintenance log.) For anything non-obvious that will be worked on later, put it in a to-do list.
setting it up
- match the legs with the corners; shorter in front, taller in back
- stand the main cabinet up on its back
- attach the front two legs, making sure they’re snug
- with two people, tip it forward so it’s resting on its front legs
- with two people, lift up the back and and put the pinball thing under it (the long way)
- with two people, attach the rear legs, making sure they’re snug
- remove the pinball thing
- with two people, if the backbox is separate, put it on and bolt it down, making sure that the power cord will be free to be plugged in
before powering on
- clean out any loose parts and labels in cabinet and backbox, and put them in a quart ziplock labeled LOOSE PARTS
- if there is a manual or other paperwork, put it in a 2-gallon ziplock
- vacuum out the cabinet and backbox
- check the power cord; if it is damaged, short, or ungrounded, replace it
- use a multimeter to check that all 3 prongs are connected, especially the ground
- check the wiring to the switch and main transformer
- check that all the fuses are present and the correct values
- look for damaged or burnt components
- if cables have been disconnected in the move, make sure that they are all back in their proper places
- look for loose/floating wires
- look for wires or wire bundles that rub or are at risk of getting caught when the playfield, backbox, or coin door are opened and closed
- look for loose or disconnected cables
- if necessary, untangle cables
- look for loose nuts, posts, etc
- look for circuit board damage (e.g., burning or corrosion from batteries)
- if it has batteries, replace them with fresh lithium ones
If you’re pretty confident that nothing bad will happen, you’re ready to plug it in and turn it on.
first power on
- know where the fire extinguisher is
- plug it in and make sure the magic smoke doesn’t come out
- be ready to immediately turn it off or unplug it
- turn it on; watch for sparks or crackling; smell for smoke or melting
- look at
- general illumination
- controlled illumination
- displays
- initial startup cycle
If it makes it through the startup cycle in good form, you’re ready to start a game.
first game
- replace the ball(s) with new ones
- start the game, adding credits if needed
- launch the ball and try it out
- look for
- smooth rolling
- all flippers working and strong enough to make key shots
- lights working
- switches working
- all active elements working
- ramps and wireforms are working well (not loose, not cracked, ball moves smoothly)
- correct sound (bells, chimes, audio, voice)
- correct displays (all digits on all positions work, displays work well and look good)
- switches properly gapped (e.g., slingshots fire correctly)
You will probably find some things to fix and adjust. Go for it. If you’re working on a solid state machine, remember to never use metal tools while the machine is on.
detail work
These will take a while, but they’re worth doing well. Dirt is a major cause of playfield wear, which we want to minimize. And it’s much easier to fix a problem now when the machine is in the workshop than later when it causes a problem for players on the floor.
- thoroughly clean the playfield and playfield elements
- replace any elastics that are worn or too dirty to clean
- check every bulb, possibly using a self-test
- if it’s an LED but the machine came with incandescents, replace it (when in doubt, use a #47)
- if it’s dim or flaky, try cleaning the socket and/or replacing the bulb
- replace #44s with #47s
- if it’s dim and behind plastic, try cleaning both sides of the plastic and the bulb
- look for loose screws, missing post caps, and other things out of spec; if needed, search for photos showing what it looks like
- look for cracked or broken plastic elements; stabilize or replace
- check every switch, possibly using a self test
- replace at least the coin door lock with our standard lock, text up, so that when it’s locked the key slot is horizontal
- if the backbox lock is in good shape, you can just hang the key(s) on a hook inside the coin door (which you can make out of wire or a paperclip if there isn’t one); otherwise, replace it with the standard one
- make sure the backglass doesn’t rattle even when shaking the machine; if it does you may need to add tape or padding
- make the the backglass trim, if there is any, doesn’t easily come off
- check the beer seal on the lockbar and replace as needed
- level the machine
settings
If you haven’t done it earlier, when appropriate makes sure the machine is set for:
- standard settings (for this, it may be easiest just to leave the machine off with batteries out for 30 seconds or so)
- free play
- correct number of balls per game (3 for solid state, 5 for EM)
- if it has a match mode, it should be on (doesn’t matter for free play, but people like it)
- a reasonable volume level
- correct date and time
- connected to our wifi
- Insider Connected activated for our account
final cleaning
Once everything internal is clean, safe, solid, and working well, it’s time for a final cleaning.
- clean the legs
- clean the main cabinet
- clean the backbox
- clean the lock bar
- clean the backglass
- clean the playfield glass (do both sides, and wear gloves so you don’t smudge it before putting it back)
finishing up
- any significant work has been logged here or in a new log entry
- change the machine status to Good
Workshop
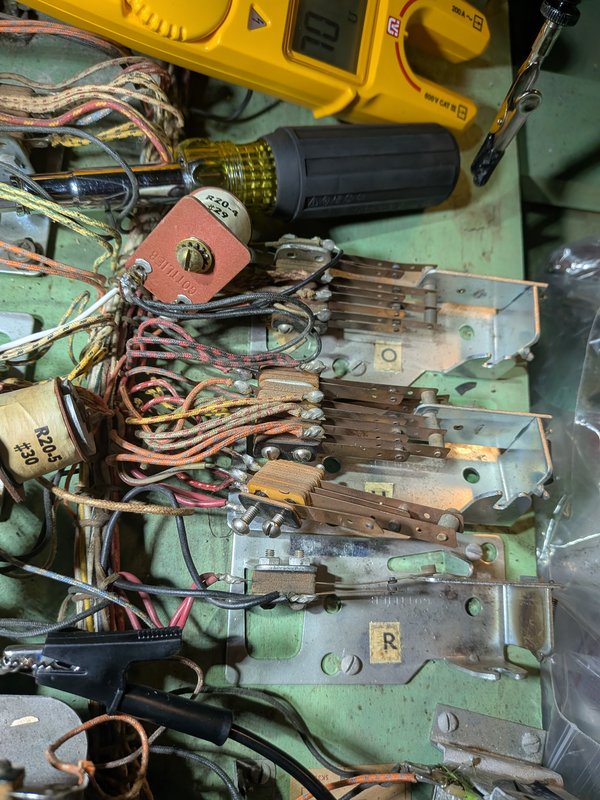
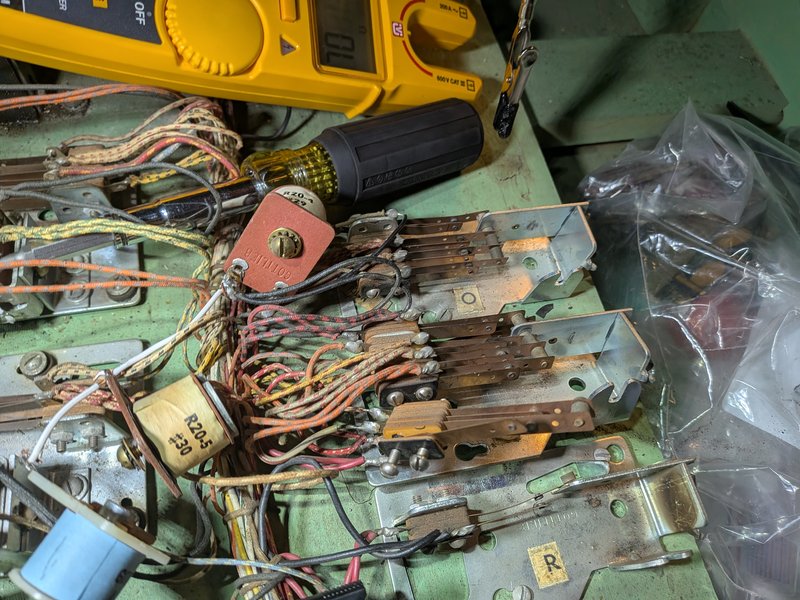
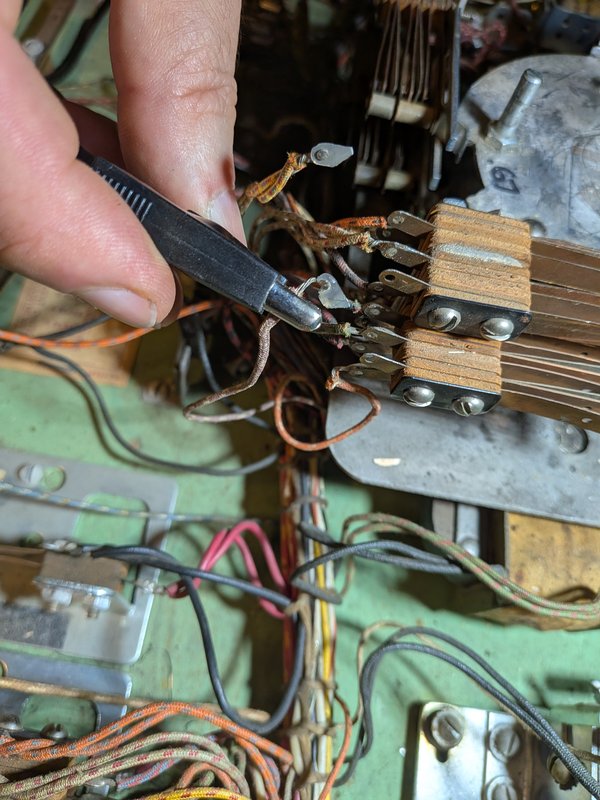
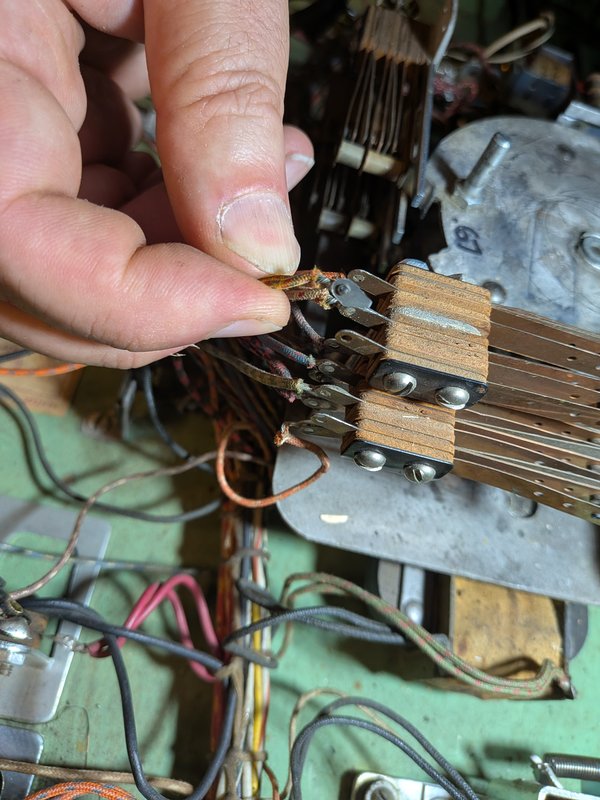
William tested continuity in the 120V circuit, tracing the path through Relay U. Here we found one of the soldered connections loose. We found that removing all 3 relay brackets, then removing their solenoids, allows best access to the leaf switch connections.
In soldering the loose connection, we knocked several others loose. The whole machine was probably poorly constructed 60 years ago.
In any case, after all that resoldering, we are in a state where the machine does not start. We ended up finding the Yellow-Black to Red-Blue connector on the bottom of Relay U, one of the ones we had resoldered, is short all the time now. We don’t think the problem is the leaf switch, but we are honestly not sure.
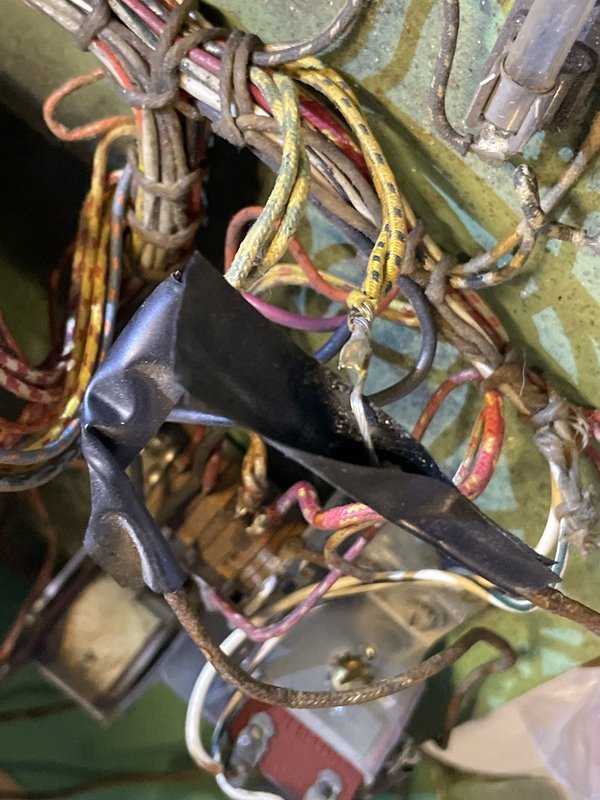
Blue and yellow wires by coin door are protected by electrical tape. Do something more permanent
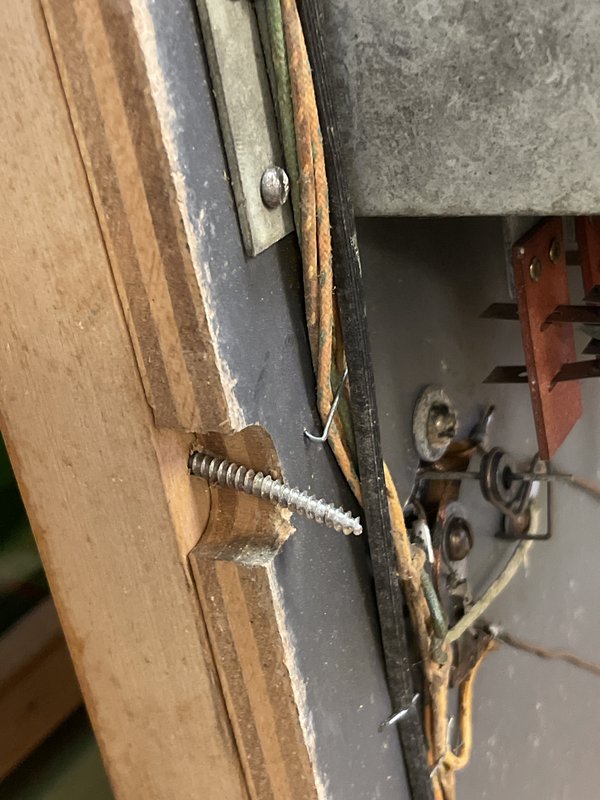
intake checklist
When we receive a machine, even when we’re told it’s perfect, we need to check it out and get it up to our standards. That’s usually not hard, but there are a lot of small things.
As you go through this checklist, you will find problems. If they’re obvious or if you’re going to take care of them right away, there’s no need to put them in a checklist. (But if you take care of things, make sure to mention it in the maintenance log.) For anything non-obvious that will be worked on later, put it in a to-do list.
setting it up
- match the legs with the corners; shorter in front, taller in back
- stand the main cabinet up on its back
- attach the front two legs, making sure they’re snug
- with two people, tip it forward so it’s resting on its front legs
- with two people, lift up the back and and put the pinball thing under it (the long way)
- with two people, attach the rear legs, making sure they’re snug
- remove the pinball thing
- with two people, if the backbox is separate, put it on and bolt it down, making sure that the power cord will be free to be plugged in
before powering on
- clean out any loose parts and labels in cabinet and backbox, and put them in a quart ziplock labeled LOOSE PARTS
- if there is a manual or other paperwork, put it in a 2-gallon ziplock
- vacuum out the cabinet and backbox
- check the power cord; if it is damaged, short, or ungrounded, replace it
- use a multimeter to check that all 3 prongs are connected, especially the ground
- check the wiring to the switch and main transformer
- check that all the fuses are present and the correct values
- look for damaged or burnt components
- if cables have been disconnected in the move, make sure that they are all back in their proper places
- look for loose/floating wires
- look for wires or wire bundles that rub or are at risk of getting caught when the playfield, backbox, or coin door are opened and closed
- look for loose or disconnected cables
- if necessary, untangle cables
- look for loose nuts, posts, etc
- look for circuit board damage (e.g., burning or corrosion from batteries)
- if it has batteries, replace them with fresh lithium ones
If you’re pretty confident that nothing bad will happen, you’re ready to plug it in and turn it on.
first power on
- know where the fire extinguisher is
- plug it in and make sure the magic smoke doesn’t come out
- be ready to immediately turn it off or unplug it
- turn it on; watch for sparks or crackling; smell for smoke or melting
- look at
- general illumination
- controlled illumination
- displays
- initial startup cycle
If it makes it through the startup cycle in good form, you’re ready to start a game.
first game
- replace the ball(s) with new ones
- start the game, adding credits if needed
- launch the ball and try it out
- look for
- smooth rolling
- all flippers working and strong enough to make key shots
- lights working
- switches working
- all active elements working
- ramps and wireforms are working well (not loose, not cracked, ball moves smoothly)
- correct sound (bells, chimes, audio, voice)
- correct displays (all digits on all positions work, displays work well and look good)
- switches properly gapped (e.g., slingshots fire correctly)
You will probably find some things to fix and adjust. Go for it. If you’re working on a solid state machine, remember to never use metal tools while the machine is on.
detail work
These will take a while, but they’re worth doing well. Dirt is a major cause of playfield wear, which we want to minimize. And it’s much easier to fix a problem now when the machine is in the workshop than later when it causes a problem for players on the floor.
- thoroughly clean the playfield and playfield elements
- replace any elastics that are worn or too dirty to clean
- check every bulb, possibly using a self-test
- if it’s an LED but the machine came with incandescents, replace it (when in doubt, use a #47)
- if it’s dim or flaky, try cleaning the socket and/or replacing the bulb
- replace #44s with #47s
- if it’s dim and behind plastic, try cleaning both sides of the plastic and the bulb
- look for loose screws, missing post caps, and other things out of spec; if needed, search for photos showing what it looks like
- look for cracked or broken plastic elements; stabilize or replace
- check every switch, possibly using a self test
- replace at least the coin door lock with our standard lock, text up, so that when it’s locked the key slot is horizontal
- if the backbox lock is in good shape, you can just hang the key(s) on a hook inside the coin door (which you can make out of wire or a paperclip if there isn’t one); otherwise, replace it with the standard one
- make sure the backglass doesn’t rattle even when shaking the machine; if it does you may need to add tape or padding
- make the the backglass trim, if there is any, doesn’t easily come off
- check the beer seal on the lockbar and replace as needed
- level the machine
settings
If you haven’t done it earlier, when appropriate makes sure the machine is set for:
- standard settings (for this, it may be easiest just to leave the machine off with batteries out for 30 seconds or so)
- free play
- correct number of balls per game (3 for solid state, 5 for EM)
- if it has a match mode, it should be on (doesn’t matter for free play, but people like it)
- a reasonable volume level
- correct date and time
- connected to our wifi
- Insider Connected activated for our account
final cleaning
Once everything internal is clean, safe, solid, and working well, it’s time for a final cleaning.
- clean the legs
- clean the main cabinet
- clean the backbox
- clean the lock bar
- clean the backglass
- clean the playfield glass (do both sides, and wear gloves so you don’t smudge it before putting it back)
finishing up
- any significant work has been logged here or in a new log entry
- change the machine status to Good
intake checklist
When we receive a machine, even when we’re told it’s perfect, we need to check it out and get it up to our standards. That’s usually not hard, but there are a lot of small things.
As you go through this checklist, you will find problems. If they’re obvious or if you’re going to take care of them right away, there’s no need to put them in a checklist. (But if you take care of things, make sure to mention it in the maintenance log.) For anything non-obvious that will be worked on later, put it in a to-do list.
setting it up
- match the legs with the corners; shorter in front, taller in back
- stand the main cabinet up on its back
- attach the front two legs, making sure they’re snug
- with two people, tip it forward so it’s resting on its front legs
- with two people, lift up the back and and put the pinball thing under it (the long way)
- with two people, attach the rear legs, making sure they’re snug
- remove the pinball thing
- with two people, if the backbox is separate, put it on and bolt it down, making sure that the power cord will be free to be plugged in
before powering on
- clean out any loose parts and labels in cabinet and backbox, and put them in a quart ziplock labeled LOOSE PARTS
- if there is a manual or other paperwork, put it in a 2-gallon ziplock
- vacuum out the cabinet and backbox
- check the power cord; if it is damaged, short, or ungrounded, replace it
- use a multimeter to check that all 3 prongs are connected, especially the ground
- check the wiring to the switch and main transformer
- check that all the fuses are present and the correct values
- look for damaged or burnt components
- if cables have been disconnected in the move, make sure that they are all back in their proper places
- look for loose/floating wires
- look for wires or wire bundles that rub or are at risk of getting caught when the playfield, backbox, or coin door are opened and closed
- look for loose or disconnected cables
- if necessary, untangle cables
- look for loose nuts, posts, etc
- look for circuit board damage (e.g., burning or corrosion from batteries)
- if it has batteries, replace them with fresh lithium ones
If you’re pretty confident that nothing bad will happen, you’re ready to plug it in and turn it on.
first power on
- know where the fire extinguisher is
- plug it in and make sure the magic smoke doesn’t come out
- be ready to immediately turn it off or unplug it
- turn it on; watch for sparks or crackling; smell for smoke or melting
- look at
- general illumination
- controlled illumination
- displays
- initial startup cycle
If it makes it through the startup cycle in good form, you’re ready to start a game.
first game
- replace the ball(s) with new ones
- start the game, adding credits if needed
- launch the ball and try it out
- look for
- smooth rolling
- all flippers working and strong enough to make key shots
- lights working
- switches working
- all active elements working
- ramps and wireforms are working well (not loose, not cracked, ball moves smoothly)
- correct sound (bells, chimes, audio, voice)
- correct displays (all digits on all positions work, displays work well and look good)
- switches properly gapped (e.g., slingshots fire correctly)
You will probably find some things to fix and adjust. Go for it. If you’re working on a solid state machine, remember to never use metal tools while the machine is on.
detail work
These will take a while, but they’re worth doing well. Dirt is a major cause of playfield wear, which we want to minimize. And it’s much easier to fix a problem now when the machine is in the workshop than later when it causes a problem for players on the floor.
- thoroughly clean the playfield and playfield elements
- replace any elastics that are worn or too dirty to clean
- check every bulb, possibly using a self-test
- if it’s an LED but the machine came with incandescents, replace it (when in doubt, use a #47)
- if it’s dim or flaky, try cleaning the socket and/or replacing the bulb
- replace #44s with #47s
- if it’s dim and behind plastic, try cleaning both sides of the plastic and the bulb
- look for loose screws, missing post caps, and other things out of spec; if needed, search for photos showing what it looks like
- look for cracked or broken plastic elements; stabilize or replace
- check every switch, possibly using a self test
- replace at least the coin door lock with our standard lock, text up, so that when it’s locked the key slot is horizontal
- if the backbox lock is in good shape, you can just hang the key(s) on a hook inside the coin door (which you can make out of wire or a paperclip if there isn’t one); otherwise, replace it with the standard one
- make sure the backglass doesn’t rattle even when shaking the machine; if it does you may need to add tape or padding
- make the the backglass trim, if there is any, doesn’t easily come off
- check the beer seal on the lockbar and replace as needed
- level the machine
settings
If you haven’t done it earlier, when appropriate makes sure the machine is set for:
- standard settings (for this, it may be easiest just to leave the machine off with batteries out for 30 seconds or so)
- free play
- correct number of balls per game (3 for solid state, 5 for EM)
- if it has a match mode, it should be on (doesn’t matter for free play, but people like it)
- a reasonable volume level
- correct date and time
- connected to our wifi
- Insider Connected activated for our account
final cleaning
Once everything internal is clean, safe, solid, and working well, it’s time for a final cleaning.
- clean the legs
- clean the main cabinet
- clean the backbox
- clean the lock bar
- clean the backglass
- clean the playfield glass (do both sides, and wear gloves so you don’t smudge it before putting it back)
finishing up
- any significant work has been logged here or in a new log entry
- change the machine status to Good
Storage
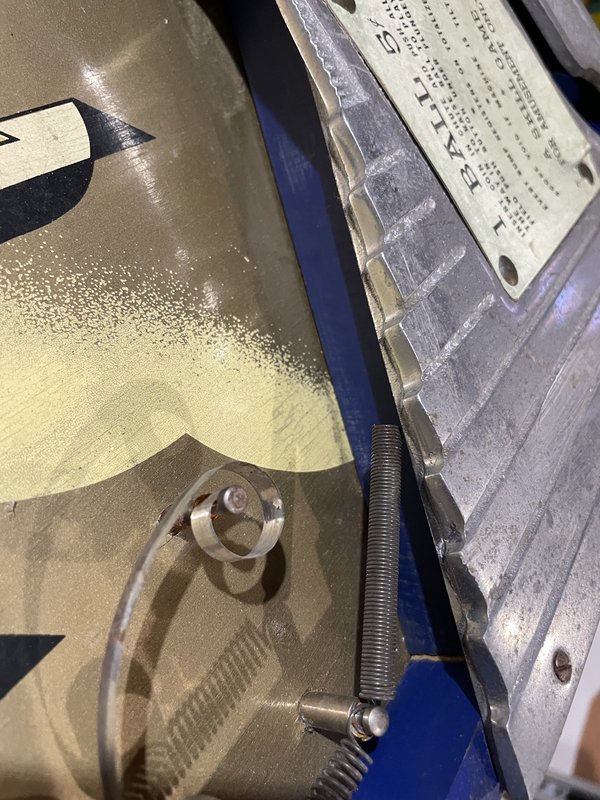
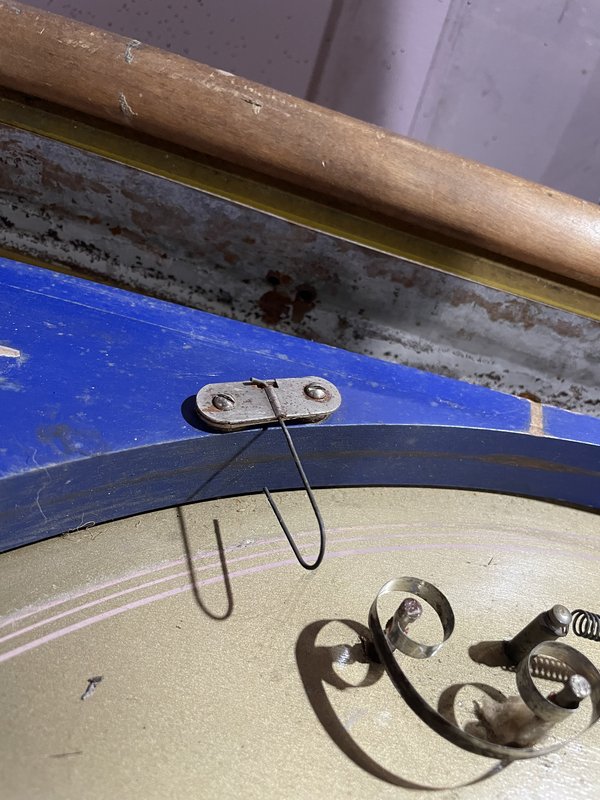
Broken springs. Most are 1/4in diameter. The side springs are 4” not including the end loops
Note some springs are mounted on only one end, as ball guides.
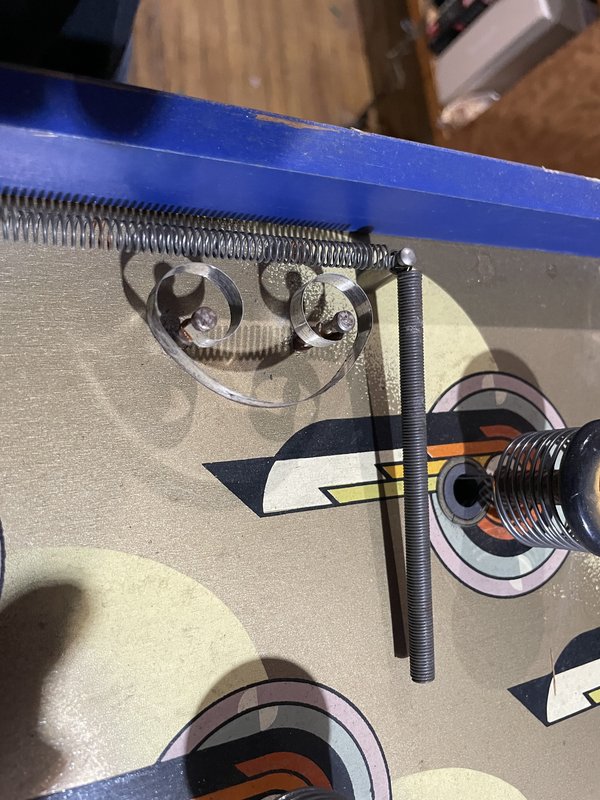
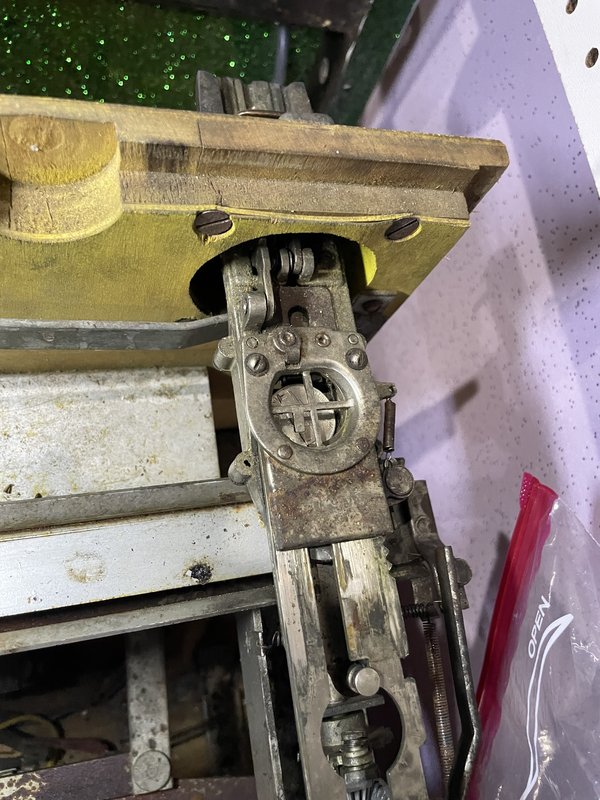
Solenoid cores are rusty
intake checklist
When we receive a machine, even when we’re told it’s perfect, we need to check it out and get it up to our standards. That’s usually not hard, but there are a lot of small things.
As you go through this checklist, you will find problems. If they’re obvious or if you’re going to take care of them right away, there’s no need to put them in a checklist. (But if you take care of things, make sure to mention it in the maintenance log.) For anything non-obvious that will be worked on later, put it in a to-do list.
setting it up
- match the legs with the corners; shorter in front, taller in back
- stand the main cabinet up on its back
- attach the front two legs, making sure they’re snug
- with two people, tip it forward so it’s resting on its front legs
- with two people, lift up the back and and put the pinball thing under it (the long way)
- with two people, attach the rear legs, making sure they’re snug
- remove the pinball thing
- with two people, if the backbox is separate, put it on and bolt it down, making sure that the power cord will be free to be plugged in
before powering on
- clean out any loose parts and labels in cabinet and backbox, and put them in a quart ziplock labeled LOOSE PARTS
- if there is a manual or other paperwork, put it in a 2-gallon ziplock
- vacuum out the cabinet and backbox
- check the power cord; if it is damaged, short, or ungrounded, replace it
- use a multimeter to check that all 3 prongs are connected, especially the ground
- check the wiring to the switch and main transformer
- check that all the fuses are present and the correct values
- look for damaged or burnt components
- if cables have been disconnected in the move, make sure that they are all back in their proper places
- look for loose/floating wires
- look for wires or wire bundles that rub or are at risk of getting caught when the playfield, backbox, or coin door are opened and closed
- look for loose or disconnected cables
- if necessary, untangle cables
- look for loose nuts, posts, etc
- look for circuit board damage (e.g., burning or corrosion from batteries)
- if it has batteries, replace them with fresh lithium ones
If you’re pretty confident that nothing bad will happen, you’re ready to plug it in and turn it on.
first power on
- know where the fire extinguisher is
- plug it in and make sure the magic smoke doesn’t come out
- be ready to immediately turn it off or unplug it
- turn it on; watch for sparks or crackling; smell for smoke or melting
- look at
- general illumination
- controlled illumination
- displays
- initial startup cycle
If it makes it through the startup cycle in good form, you’re ready to start a game.
first game
- replace the ball(s) with new ones
- start the game, adding credits if needed
- launch the ball and try it out
- look for
- smooth rolling
- all flippers working and strong enough to make key shots
- lights working
- switches working
- all active elements working
- ramps and wireforms are working well (not loose, not cracked, ball moves smoothly)
- correct sound (bells, chimes, audio, voice)
- correct displays (all digits on all positions work, displays work well and look good)
- switches properly gapped (e.g., slingshots fire correctly)
You will probably find some things to fix and adjust. Go for it. If you’re working on a solid state machine, remember to never use metal tools while the machine is on.
detail work
These will take a while, but they’re worth doing well. Dirt is a major cause of playfield wear, which we want to minimize. And it’s much easier to fix a problem now when the machine is in the workshop than later when it causes a problem for players on the floor.
- thoroughly clean the playfield and playfield elements
- replace any elastics that are worn or too dirty to clean
- check every bulb, possibly using a self-test
- if it’s an LED but the machine came with incandescents, replace it (when in doubt, use a #47)
- if it’s dim or flaky, try cleaning the socket and/or replacing the bulb
- replace #44s with #47s
- if it’s dim and behind plastic, try cleaning both sides of the plastic and the bulb
- look for loose screws, missing post caps, and other things out of spec; if needed, search for photos showing what it looks like
- look for cracked or broken plastic elements; stabilize or replace
- check every switch, possibly using a self test
- replace at least the coin door lock with our standard lock, text up, so that when it’s locked the key slot is horizontal
- if the backbox lock is in good shape, you can just hang the key(s) on a hook inside the coin door (which you can make out of wire or a paperclip if there isn’t one); otherwise, replace it with the standard one
- make sure the backglass doesn’t rattle even when shaking the machine; if it does you may need to add tape or padding
- make the the backglass trim, if there is any, doesn’t easily come off
- check the beer seal on the lockbar and replace as needed
- level the machine
settings
If you haven’t done it earlier, when appropriate makes sure the machine is set for:
- standard settings (for this, it may be easiest just to leave the machine off with batteries out for 30 seconds or so)
- free play
- correct number of balls per game (3 for solid state, 5 for EM)
- if it has a match mode, it should be on (doesn’t matter for free play, but people like it)
- a reasonable volume level
- correct date and time
- connected to our wifi
- Insider Connected activated for our account
final cleaning
Once everything internal is clean, safe, solid, and working well, it’s time for a final cleaning.
- clean the legs
- clean the main cabinet
- clean the backbox
- clean the lock bar
- clean the backglass
- clean the playfield glass (do both sides, and wear gloves so you don’t smudge it before putting it back)
finishing up
- any significant work has been logged here or in a new log entry
- change the machine status to Good
intake checklist
When we receive a machine, even when we’re told it’s perfect, we need to check it out and get it up to our standards. That’s usually not hard, but there are a lot of small things.
As you go through this checklist, you will find problems. If they’re obvious or if you’re going to take care of them right away, there’s no need to put them in a checklist. (But if you take care of things, make sure to mention it in the maintenance log.) For anything non-obvious that will be worked on later, put it in a to-do list.
setting it up
- match the legs with the corners; shorter in front, taller in back
- stand the main cabinet up on its back
- attach the front two legs, making sure they’re snug
- with two people, tip it forward so it’s resting on its front legs
- with two people, lift up the back and and put the pinball thing under it (the long way)
- with two people, attach the rear legs, making sure they’re snug
- remove the pinball thing
- with two people, if the backbox is separate, put it on and bolt it down, making sure that the power cord will be free to be plugged in
before powering on
- clean out any loose parts and labels in cabinet and backbox, and put them in a quart ziplock labeled LOOSE PARTS
- if there is a manual or other paperwork, put it in a 2-gallon ziplock
- vacuum out the cabinet and backbox
- check the power cord; if it is damaged, short, or ungrounded, replace it
- use a multimeter to check that all 3 prongs are connected, especially the ground
- check the wiring to the switch and main transformer
- check that all the fuses are present and the correct values
- look for damaged or burnt components
- if cables have been disconnected in the move, make sure that they are all back in their proper places
- look for loose/floating wires
- look for wires or wire bundles that rub or are at risk of getting caught when the playfield, backbox, or coin door are opened and closed
- look for loose or disconnected cables
- if necessary, untangle cables
- look for loose nuts, posts, etc
- look for circuit board damage (e.g., burning or corrosion from batteries)
- if it has batteries, replace them with fresh lithium ones
If you’re pretty confident that nothing bad will happen, you’re ready to plug it in and turn it on.
first power on
- know where the fire extinguisher is
- plug it in and make sure the magic smoke doesn’t come out
- be ready to immediately turn it off or unplug it
- turn it on; watch for sparks or crackling; smell for smoke or melting
- look at
- general illumination
- controlled illumination
- displays
- initial startup cycle
If it makes it through the startup cycle in good form, you’re ready to start a game.
first game
- replace the ball(s) with new ones
- start the game, adding credits if needed
- launch the ball and try it out
- look for
- smooth rolling
- all flippers working and strong enough to make key shots
- lights working
- switches working
- all active elements working
- ramps and wireforms are working well (not loose, not cracked, ball moves smoothly)
- correct sound (bells, chimes, audio, voice)
- correct displays (all digits on all positions work, displays work well and look good)
- switches properly gapped (e.g., slingshots fire correctly)
You will probably find some things to fix and adjust. Go for it. If you’re working on a solid state machine, remember to never use metal tools while the machine is on.
detail work
These will take a while, but they’re worth doing well. Dirt is a major cause of playfield wear, which we want to minimize. And it’s much easier to fix a problem now when the machine is in the workshop than later when it causes a problem for players on the floor.
- thoroughly clean the playfield and playfield elements
- replace any elastics that are worn or too dirty to clean
- check every bulb, possibly using a self-test
- if it’s an LED but the machine came with incandescents, replace it (when in doubt, use a #47)
- if it’s dim or flaky, try cleaning the socket and/or replacing the bulb
- replace #44s with #47s
- if it’s dim and behind plastic, try cleaning both sides of the plastic and the bulb
- look for loose screws, missing post caps, and other things out of spec; if needed, search for photos showing what it looks like
- look for cracked or broken plastic elements; stabilize or replace
- check every switch, possibly using a self test
- replace at least the coin door lock with our standard lock, text up, so that when it’s locked the key slot is horizontal
- if the backbox lock is in good shape, you can just hang the key(s) on a hook inside the coin door (which you can make out of wire or a paperclip if there isn’t one); otherwise, replace it with the standard one
- make sure the backglass doesn’t rattle even when shaking the machine; if it does you may need to add tape or padding
- make the the backglass trim, if there is any, doesn’t easily come off
- check the beer seal on the lockbar and replace as needed
- level the machine
settings
If you haven’t done it earlier, when appropriate makes sure the machine is set for:
- standard settings (for this, it may be easiest just to leave the machine off with batteries out for 30 seconds or so)
- free play
- correct number of balls per game (3 for solid state, 5 for EM)
- if it has a match mode, it should be on (doesn’t matter for free play, but people like it)
- a reasonable volume level
- correct date and time
- connected to our wifi
- Insider Connected activated for our account
final cleaning
Once everything internal is clean, safe, solid, and working well, it’s time for a final cleaning.
- clean the legs
- clean the main cabinet
- clean the backbox
- clean the lock bar
- clean the backglass
- clean the playfield glass (do both sides, and wear gloves so you don’t smudge it before putting it back)
finishing up
- any significant work has been logged here or in a new log entry
- change the machine status to Good
intake checklist
When we receive a machine, even when we’re told it’s perfect, we need to check it out and get it up to our standards. That’s usually not hard, but there are a lot of small things.
As you go through this checklist, you will find problems. If they’re obvious or if you’re going to take care of them right away, there’s no need to put them in a checklist. (But if you take care of things, make sure to mention it in the maintenance log.) For anything non-obvious that will be worked on later, put it in a to-do list.
setting it up
- match the legs with the corners; shorter in front, taller in back
- stand the main cabinet up on its back
- attach the front two legs, making sure they’re snug
- with two people, tip it forward so it’s resting on its front legs
- with two people, lift up the back and and put the pinball thing under it (the long way)
- with two people, attach the rear legs, making sure they’re snug
- remove the pinball thing
- with two people, if the backbox is separate, put it on and bolt it down, making sure that the power cord will be free to be plugged in
before powering on
- clean out any loose parts and labels in cabinet and backbox, and put them in a quart ziplock labeled LOOSE PARTS
- if there is a manual or other paperwork, put it in a 2-gallon ziplock
- vacuum out the cabinet and backbox
- check the power cord; if it is damaged, short, or ungrounded, replace it
- use a multimeter to check that all 3 prongs are connected, especially the ground
- check the wiring to the switch and main transformer
- check that all the fuses are present and the correct values
- look for damaged or burnt components
- if cables have been disconnected in the move, make sure that they are all back in their proper places
- look for loose/floating wires
- look for wires or wire bundles that rub or are at risk of getting caught when the playfield, backbox, or coin door are opened and closed
- look for loose or disconnected cables
- if necessary, untangle cables
- look for loose nuts, posts, etc
- look for circuit board damage (e.g., burning or corrosion from batteries)
- if it has batteries, replace them with fresh lithium ones
If you’re pretty confident that nothing bad will happen, you’re ready to plug it in and turn it on.
first power on
- know where the fire extinguisher is
- plug it in and make sure the magic smoke doesn’t come out
- be ready to immediately turn it off or unplug it
- turn it on; watch for sparks or crackling; smell for smoke or melting
- look at
- general illumination
- controlled illumination
- displays
- initial startup cycle
If it makes it through the startup cycle in good form, you’re ready to start a game.
first game
- replace the ball(s) with new ones
- start the game, adding credits if needed
- launch the ball and try it out
- look for
- smooth rolling
- all flippers working and strong enough to make key shots
- lights working
- switches working
- all active elements working
- ramps and wireforms are working well (not loose, not cracked, ball moves smoothly)
- correct sound (bells, chimes, audio, voice)
- correct displays (all digits on all positions work, displays work well and look good)
- switches properly gapped (e.g., slingshots fire correctly)
You will probably find some things to fix and adjust. Go for it. If you’re working on a solid state machine, remember to never use metal tools while the machine is on.
detail work
These will take a while, but they’re worth doing well. Dirt is a major cause of playfield wear, which we want to minimize. And it’s much easier to fix a problem now when the machine is in the workshop than later when it causes a problem for players on the floor.
- thoroughly clean the playfield and playfield elements
- replace any elastics that are worn or too dirty to clean
- check every bulb, possibly using a self-test
- if it’s an LED but the machine came with incandescents, replace it (when in doubt, use a #47)
- if it’s dim or flaky, try cleaning the socket and/or replacing the bulb
- replace #44s with #47s
- if it’s dim and behind plastic, try cleaning both sides of the plastic and the bulb
- look for loose screws, missing post caps, and other things out of spec; if needed, search for photos showing what it looks like
- look for cracked or broken plastic elements; stabilize or replace
- check every switch, possibly using a self test
- replace at least the coin door lock with our standard lock, text up, so that when it’s locked the key slot is horizontal
- if the backbox lock is in good shape, you can just hang the key(s) on a hook inside the coin door (which you can make out of wire or a paperclip if there isn’t one); otherwise, replace it with the standard one
- make sure the backglass doesn’t rattle even when shaking the machine; if it does you may need to add tape or padding
- make the the backglass trim, if there is any, doesn’t easily come off
- check the beer seal on the lockbar and replace as needed
- level the machine
settings
If you haven’t done it earlier, when appropriate makes sure the machine is set for:
- standard settings (for this, it may be easiest just to leave the machine off with batteries out for 30 seconds or so)
- free play
- correct number of balls per game (3 for solid state, 5 for EM)
- if it has a match mode, it should be on (doesn’t matter for free play, but people like it)
- a reasonable volume level
- correct date and time
- connected to our wifi
- Insider Connected activated for our account
final cleaning
Once everything internal is clean, safe, solid, and working well, it’s time for a final cleaning.
- clean the legs
- clean the main cabinet
- clean the backbox
- clean the lock bar
- clean the backglass
- clean the playfield glass (do both sides, and wear gloves so you don’t smudge it before putting it back)
finishing up
- any significant work has been logged here or in a new log entry
- change the machine status to Good
intake checklist
When we receive a machine, even when we’re told it’s perfect, we need to check it out and get it up to our standards. That’s usually not hard, but there are a lot of small things.
As you go through this checklist, you will find problems. If they’re obvious or if you’re going to take care of them right away, there’s no need to put them in a checklist. (But if you take care of things, make sure to mention it in the maintenance log.) For anything non-obvious that will be worked on later, put it in a to-do list.
setting it up
- match the legs with the corners; shorter in front, taller in back
- stand the main cabinet up on its back
- attach the front two legs, making sure they’re snug
- with two people, tip it forward so it’s resting on its front legs
- with two people, lift up the back and and put the pinball thing under it (the long way)
- with two people, attach the rear legs, making sure they’re snug
- remove the pinball thing
- with two people, if the backbox is separate, put it on and bolt it down, making sure that the power cord will be free to be plugged in
before powering on
- clean out any loose parts and labels in cabinet and backbox, and put them in a quart ziplock labeled LOOSE PARTS
- if there is a manual or other paperwork, put it in a 2-gallon ziplock
- vacuum out the cabinet and backbox
- check the power cord; if it is damaged, short, or ungrounded, replace it
- use a multimeter to check that all 3 prongs are connected, especially the ground
- check the wiring to the switch and main transformer
- check that all the fuses are present and the correct values
- look for damaged or burnt components
- if cables have been disconnected in the move, make sure that they are all back in their proper places
- look for loose/floating wires
- look for wires or wire bundles that rub or are at risk of getting caught when the playfield, backbox, or coin door are opened and closed
- look for loose or disconnected cables
- if necessary, untangle cables
- look for loose nuts, posts, etc
- look for circuit board damage (e.g., burning or corrosion from batteries)
- if it has batteries, replace them with fresh lithium ones
If you’re pretty confident that nothing bad will happen, you’re ready to plug it in and turn it on.
first power on
- know where the fire extinguisher is
- plug it in and make sure the magic smoke doesn’t come out
- be ready to immediately turn it off or unplug it
- turn it on; watch for sparks or crackling; smell for smoke or melting
- look at
- general illumination
- controlled illumination
- displays
- initial startup cycle
If it makes it through the startup cycle in good form, you’re ready to start a game.
first game
- replace the ball(s) with new ones
- start the game, adding credits if needed
- launch the ball and try it out
- look for
- smooth rolling
- all flippers working and strong enough to make key shots
- lights working
- switches working
- all active elements working
- ramps and wireforms are working well (not loose, not cracked, ball moves smoothly)
- correct sound (bells, chimes, audio, voice)
- correct displays (all digits on all positions work, displays work well and look good)
- switches properly gapped (e.g., slingshots fire correctly)
You will probably find some things to fix and adjust. Go for it. If you’re working on a solid state machine, remember to never use metal tools while the machine is on.
detail work
These will take a while, but they’re worth doing well. Dirt is a major cause of playfield wear, which we want to minimize. And it’s much easier to fix a problem now when the machine is in the workshop than later when it causes a problem for players on the floor.
- thoroughly clean the playfield and playfield elements
- replace any elastics that are worn or too dirty to clean
- check every bulb, possibly using a self-test
- if it’s an LED but the machine came with incandescents, replace it (when in doubt, use a #47)
- if it’s dim or flaky, try cleaning the socket and/or replacing the bulb
- replace #44s with #47s
- if it’s dim and behind plastic, try cleaning both sides of the plastic and the bulb
- look for loose screws, missing post caps, and other things out of spec; if needed, search for photos showing what it looks like
- look for cracked or broken plastic elements; stabilize or replace
- check every switch, possibly using a self test
- replace at least the coin door lock with our standard lock, text up, so that when it’s locked the key slot is horizontal
- if the backbox lock is in good shape, you can just hang the key(s) on a hook inside the coin door (which you can make out of wire or a paperclip if there isn’t one); otherwise, replace it with the standard one
- make sure the backglass doesn’t rattle even when shaking the machine; if it does you may need to add tape or padding
- make the the backglass trim, if there is any, doesn’t easily come off
- check the beer seal on the lockbar and replace as needed
- level the machine
settings
If you haven’t done it earlier, when appropriate makes sure the machine is set for:
- standard settings (for this, it may be easiest just to leave the machine off with batteries out for 30 seconds or so)
- free play
- correct number of balls per game (3 for solid state, 5 for EM)
- if it has a match mode, it should be on (doesn’t matter for free play, but people like it)
- a reasonable volume level
- correct date and time
- connected to our wifi
- Insider Connected activated for our account
final cleaning
Once everything internal is clean, safe, solid, and working well, it’s time for a final cleaning.
- clean the legs
- clean the main cabinet
- clean the backbox
- clean the lock bar
- clean the backglass
- clean the playfield glass (do both sides, and wear gloves so you don’t smudge it before putting it back)
finishing up
- any significant work has been logged here or in a new log entry
- change the machine status to Good